🎉 Our Office 365 Reporting Tool is now available in Azure Marketplace 🚀
This website uses cookies to improve your experience. We'll assume you're ok with this. Know more.
SharePoint Online

How to Audit Sensitivity Labels in SharePoint Online

Are you confident that your organization’s sensitive data is adequately protected with the correct sensitivity labels? Misapplied or missing sensitivity labels can expose your organization to unauthorized access, leading to potential data breaches. Regular auditing of sensitivity labels is crucial to ensure proper protection and to quickly address any discrepancies. Thus, this guide will help you to track sensitivity label changes in SharePoint Online to strengthen your Microsoft 365 data security.

Using Microsoft Purview Compliance Portal

Microsoft 365 Permission Required
View-Only Audit Logs roles Least Privilege
Global Admin Most Privilege
  • Navigate to the Audit section in the Purview portal.
  • Customize the start and end date as per your requirement.
  • Apply filter for the following operations in the "Activities - operation names" field.

    SiteSensitivityLabelApplied, SiteSensitivityLabelRemoved, SiteSensitivityLabelChanged, FileSensitivityLabelApplied, FileSensitivityLabelChanged, FileSensitivityLabelRemoved, DocumentSensitivityMismatchDetected

  • In the Workloads drop-down menu, type 'SharePoint' in the search field and select it from the list.
  • Then, click Search. Once the search has been completed, you can view and export the SPO sensitivity label activities.
Using Microsoft Purview Compliance Portal
  • Note: While we attempt to export the 'Audit Search' results, the details, such as user and site information are provided in JSON format within the CSV file, which requires additional filtering to extract specific data.

Using Windows PowerShell

Microsoft 365 Permission Required
View-Only Audit Logs roles Least Privilege
Global Admin Most Privilege
  • To overcome the limitation of the Purview compliance portal, we created a PowerShell script that filters the data into a more user-friendly format for Microsoft 365 admins.
  • Execute the below cmdlet to retrieve all the activities of sensitivity labels in SharePoint Online.

    Note: Replace <MM/DD/YYYY> with the date for your audit search and <FileName>.csv with the desired name for your CSV export file.
  • Windows PowerShell Windows PowerShell
     Connect-ExchangeOnline 
    
    $FileOperation = "DocumentSensitivityMismatchDetected, FileSensitivityLabelApplied, FileSensitivityLabelChanged, FileSensitivityLabelRemoved "
    
    $SiteOperation = "SiteSensitivityLabelApplied, SiteSensitivityLabelRemoved, SiteSensitivityLabelChanged"
    
    Search-UnifiedAuditLog -StartDate <MM/DD/YYYY> -EndDate <MM/DD/YYYY> -Operations "$FileOperation, $SiteOperation" –SessionCommand ReturnLargeSet | 
    ForEach-Object {   
        $auditData = $_.AuditData | ConvertFrom-Json
    
    if ($auditData.Workload -eq "SharePoint") {
    [PSCustomObject]@{
    CreationTime = $auditData.CreationTime
    UserId = $auditData.UserId
    Operation = $auditData.Operation
    Workload = $auditData.Workload
    ObjectID = $auditData.ObjectID
    SourceFileName = $auditData.SourceFileName
    ClientIP = $auditData.ClientIP
    UserAgent = $auditData.UserAgent
    AuditData = $_.AuditData
    }
    }
    } | Sort-Object CreationTime | Export-Csv –Path "<FileName>.csv" -NoTypeInformation
Using Windows PowerShell

Ensure effective data classification with AdminDroid’s SharePoint Online sensitivity label auditing reports!

AdminDroid's SharePoint Online auditing tool empowers you to track all sensitivity label changes across your organization. It provides detailed reports that enable you to track how sensitivity labels are applied, removed, and modified to effectively manage them for optimal data protection and compliance within your Microsoft 365 environment.

Monitor Changes in Auto-Labeling Policies and Rules

Leverage the report on changes in auto-labeling policies and rules to ensure that your auto-labeling procedures are aligned with your organization's data classification and protection needs in Microsoft 365.

Track Label Removals to Secure File Data Proactively

Use the sensitivity label removed files report to identify activities that lack sufficient justification for label removal, which may help you find any unauthorized actions.

Improve File Safety by Detecting Sensitivity Mismatches

Utilize the sensitivity mismatch detection report to identify high priority sensitivity label applied files stored in less secure sites that help you relocate files to sites with the same or higher label priority.

Optimize Sensitivity Label Policy Enforcement

Analyze the sensitivity label policies report to determine if users consistently apply the correct labels to their data and identify trends in labeling practices.

Uncover Sensitivity Label Removed SPO Sites

Employ the sensitivity label removed sites report to ensure critical data isn't left unprotected and to prevent accidental exposure of sensitive information.

Stay Updated to Sensitivity Label Modifications

Schedule site sensitivity label changes report to find sites that frequently changing the label to find unusual label activities in those SharePoint Online sites.

Overall, AdminDroid’s SharePoint Online management tool offers powerful features to track the sensitivity label activities efficiently. Gain insights into file usage, external sharing, and user activities to maintain comprehensive control over data protection and compliance within your SharePoint Online environment.

Explore a full range of reporting options

Important Tips

While configuring sensitivity labels, set the 'User access to content expires' option to automatically limit how long users can access label-applied files.

Use Conditional Access policies to block the download of confidential files from SharePoint Online and stay away from phishing attacks.

Utilize the adaptive protection for insider risk management to protect sensitive data data from a suspicious insider in your Micrsoft 365 environment.

Common Errors and Resolution Steps

The following are possible errors and troubleshooting hints when auditing sensitivity labels in SharePoint Online.

Error The selected sensitivity label has inherent external file sharing setting, this overrides the existing setting. Learn more about sensitivity labels.

This warning occurs when you apply a sensitivity label with external sharing conditions to a site from the SharePoint admin center. 

Fix To resolve this error, change the external sharing conditions in the sensitivity label to align with the site’s external sharing settings.

Error Error: Sensitivity label cannot be applied at this time due to internal error.

This error occurs when you apply a sensitivity label to a file that is not compatible with the file's content type. 

Fix Use a sensitivity label that includes the file's content type, or if you don't have one, create a sensitivity label with the file content type included.

Error Set-SPOSite : Invalid label id: '<LabelName>'. Please enter a valid label.

This error occurs when any other value is used instead of 'Guid' of the label in the Set-SPOSite cmdlet.

Fix Use appropriate label Guid as an argument for the -SensitivityLabel parameter in the Set-SPOSite cmdlet.

Error Sorry, you don't have permission to open this document. The document is protected by a rights management service, such as Azure Information Protection.

This error occurs when you attempt to open a file with a sensitivity label for which you do not have the necessary access permission.

Fix If you have admin privileges, assign yourself permission to access sensitivity label-applied files. Otherwise, request a member of the Information Protection role group to grant you access.

Error This PDF Document has been protected. The reader you are using does not support opening files protected by Microsoft Office.

This error occurs when you open a sensitivity label-applied PDF file in a web browser that does not support opening protected PDF files.

Fix To resolve errors when viewing protected PDF files, follow the steps to open sensitivity label-applied PDF files.

Frequently Asked Questions

Use Sensitivity Labels to Protect SharePoint Online Files from Unauthorized Access

How to enable sensitivity labels for files in SharePoint Online?

How to enable sensitivity labels for files in SharePoint Online? +

Sensitivity labels protect your organization's data by classifying and securing files based on their content. Enabling sensitivity labels in SharePoint Online ensures that files containing sensitive information are properly protected in your organization.

Follow any of the methods below to enable sensitivity labels in SharePoint Online.

Enable sensitivity labels from Microsoft Purview compliance portal

  • Sign in to the Microsoft Purview compliance portal.
  • Navigate to Labels under Solutions»Information protection.
  • If your organization hasn't enabled the ability to open or edit encrypted files with sensitivity labels in OneDrive and SharePoint, you will see a warning message.
  • Click the Turn on now button in the message to enable sensitivity labels for SharePoint Online and OneDrive.
enabling-sensitivity-label

Enable sensitivity labels using SharePoint Online Management Shell

You can also enable sensitivity label for SharePoint Online using PowerShell.

  • Connect to SharePoint Online using the cmdlet below.
    Connect-SPOService –Url https://<yourtenantname>-admin.sharepoint.com
  • Run the following cmdlet to enable sensitivity label support for SharePoint Online.
    Set-SPOTenant -EnableAIPIntegration $true

Once enabled, you can create and publish sensitivity labels to apply to SharePoint Online sites, document libraries and files.

Note: To disable the sensitivity label feature for SharePoint Online, change the -EnableAIPIntegration parameter to $false, as there is no option available to disable sensitivity labels from the Purview compliance portal.

How to manage sensitivity label to SharePoint Online sites?

How to manage sensitivity label to SharePoint Online sites? +

Managing SharePoint Online sites by sensitivity level helps to protect sensitive data and reinforces overall organizational security. Follow the steps below to apply and remove sensitivity labels on SharePoint sites.

Apply sensitivity labels to SharePoint Online sites

Using SharePoint Admin Center:
  • Log in to the SharePoint admin center and navigate to Active sites under the Sites section.
  • Click the desired site name, then go to the 'Settings' tab.
  • Open the Sensitivity label drop-down menu. Select the desired label and click Save to apply a sensitivity label to a site using SharePoint admin center.
Using SharePoint Online Management Shell:
  • To apply sensitivity labels to a SharePoint Online site, connect to the Security and Compliance center as an administrator using the following cmdlet.
    Connect-IPPSSession
  • Run the following cmdlet to list available labels and copy the Guid of a label that holds the ContentType as 'Site'.
    Get-Label | Format-Table Priority, ContentType, Name, Guid
  • Then, connect to SharePoint Online Management Shell using the cmdlet below.
    Connect-SPOService –Url https://<Tenant>-admin.sharepoint.com
  • Execute the below cmdlet by replacing the copied label's Guid to apply sensitivity label for a site.
    Set-SPOSite -Identity <SiteUrl> -SensitivityLabel <Guid> 

Remove sensitivity labels from SharePoint Online sites

Using SharePoint Admin Center:
  • Log in to the SharePoint admin center, then navigate to Sites and select Active sites.
  • Select the desired site name, then open the 'Settings' tab.
  • Choose None from the Sensitivity label drop-down menu and click Save to remove the label.
Using SharePoint Online Management Shell:
  • To remove the sensitivity label from the SharePoint Online site using PowerShell, simply run the following cmdlet after connecting to SharePoint Online.
    Set-SPOSite –Identity <SiteUrl> -RemoveLabel

How to audit sensitivity label applied files’ activities in SharePoint Online?

How to audit sensitivity label applied files’ activities in SharePoint Online? +

Many organizations rely on sensitivity labels to protect their sensitive data in SharePoint Online. Therefore, it has become essential to audit events generated by label-applied files to track how they are accessed and modified. This process helps to identify any unauthorized changes or access attempts and enhances your oversight of data handling practices.

To audit events associated with sensitivity label applied files, connect to Exchange Online PowerShell using the Connect-ExchangeOnline cmdlet.

Next, run the following cmdlet to export details of sensitivity-label applied files’ activities.

$Operations = "FileSensitivityLabelChanged, FileSensitivityLabelRemoved, DocumentSensitivityMismatchDetected, SensitivityLabeledFileOpened, SensitivityLabeledFileRenamed"

Search-UnifiedAuditLog –StartDate <MM/DD/YYYY> -EndDate <MM/DD/YYYY> -Operations $Operations –SessionCommand ReturnLargeSet | Export-Csv –path "<FileName>.csv"

audit-events-by-sensitvity-labeled-files

Additionally, auditing file usage in SharePoint Online enhances your ability to monitor confidential data and ensures that security measures, such as sensitivity labels, DLP, and IRM, are correctly applied.

How to audit sensitivity labels on PDF files in SharePoint Online?

How to audit sensitivity labels on PDF files in SharePoint Online? +

Organizations often recommend using PDFs files to share sensitive information because of their widely recognized non-editable format. However, the risk of data leakage still exists, as users can copy text from PDFs.

To mitigate this risk, it is crucial to apply and audit sensitivity labels on PDF files regularly, ensuring that access to sensitive content is securely managed and controlled within SharePoint Online.

Follow these steps to audit sensitivity labels on PDF files in SharePoint Online.

  • Navigate to the Audit section in the Microsoft Purview compliance portal.
  • Set the start & end date and select the following activities in the Activities - friendly names field.

    Applied sensitivity label to file, Changed sensitivity label applied to file, Removed sensitivity label from file

  • In the 'File, folder, or site' field, enter *.pdf. Then, choose SharePoint under Workloads and click the Search.
  • Once the search is completed, you'll see all the sensitivity label activities performed on PDF files within SharePoint Online.

You can also track other file formats that support sensitivity labels, such as Word (.docx, .docm), Excel (.xlsx, .xlsm, .xlsb), and PowerPoint (.pptx, .ppsx) using the steps mentioned above.

Note: By default, sensitivity label support for PDF files is disabled in Microsoft 365. To enable it, run the following cmdlet in SharePoint Online Management Shell.

Set-SPOTenant -EnableSensitivityLabelforPDF $True

How to analyze document sensitivity label mismatches in SPO?

How to analyze document sensitivity label mismatches in SPO? +

A document sensitivity label mismatch occurs when a file has a higher-priority label than the site where it’s stored. This can expose metadata like titles and author, even if the file remains inaccessible to users.

When mismatches are detected, details like sensitivity label IDs, the priority levels for both the file & the site, along with the file's name and location, are provided. However, the identity of the user responsible for the mismatch is not included.

To retrieve the user responsible for a mismatch, you can use the FileUpload and FileModified events through Exchange Online PowerShell. Simply run the following PowerShell script, replacing <MM/DD/YYYY> with the appropriate start and end date.

Connect-ExchangeOnline 

$auditData = Search-UnifiedAuditLog -StartDate <MM/DD/YYYY> -EndDate <MM/DD/YYYY> -ResultSize 5000 -Operations "FileUploaded, FileModified, DocumentSensitivityMismatchDetected"  

$event = @{}  

$auditData | Where-Object {$_.Operations -ne "DocumentSensitivityMismatchDetected"} | ForEach-Object {  
    $data = $_.AuditData | ConvertFrom-Json  
    $event[$data.ListItemUniqueId] = $data.UserId
}  

$mismatchReport = $auditData | Where-Object {$_.Operations -eq "DocumentSensitivityMismatchDetected"} | ForEach-Object {  
    $data = $_.AuditData | ConvertFrom-Json  
    $user = if ($event[$data.ListItemUniqueId]){
    $event[$data.ListItemUniqueId]  
    } else { "SharePoint Online" }  
    [PSCustomObject]@{  
        Date         = $_.CreationDate  
        FileName     = $data.SourceFileName  
        User         = $user  
        SitePriority = $data.SiteSensitivityLabelOrder  
        FilePriority = $data.SensitivityLabelOrder  
    }
}  
$mismatchReport | Sort-Object Date | Format-Table

The script will provide key details about document sensitivity label mismatches, including the date, file name, responsible user, and sensitivity priorities for both the file and site. This helps you quickly resolve these mismatches in SharePoint Online.

+

Kickstart Your Journey With
AdminDroid

Your Microsoft 365 Companion with Enormous Reporting Capabilities

Download Now
User Help Manuals Compliance Docs
x
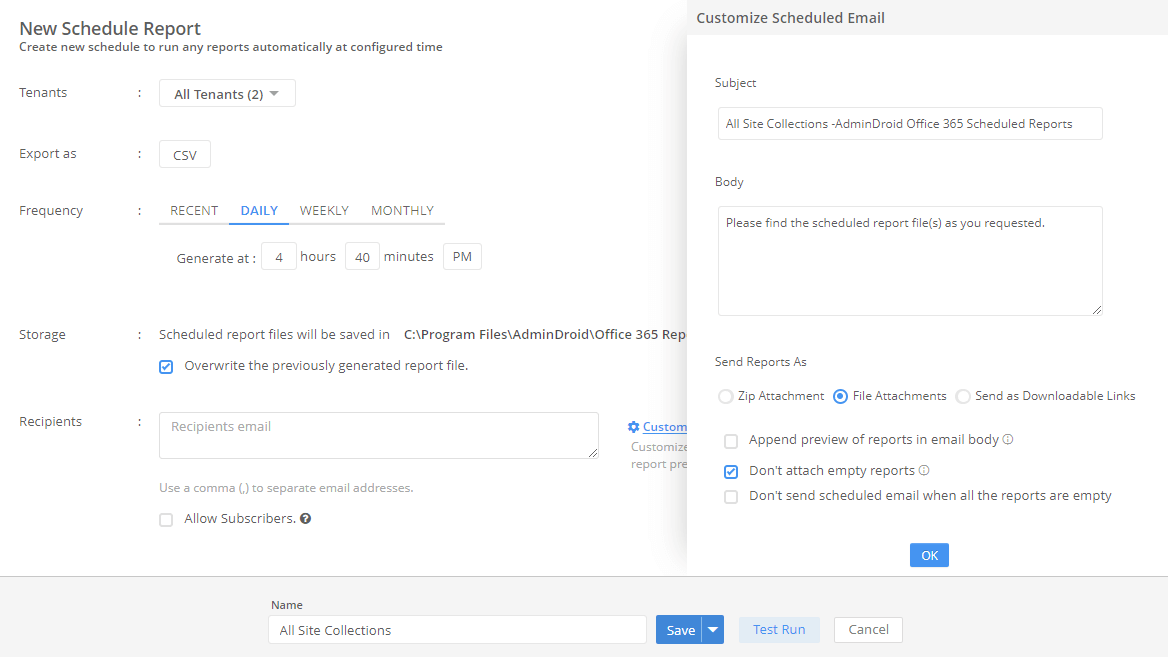
Delivering Reports on Time
Want a desired Microsoft 365 reports every Monday morning? Ensure automated report distribution and timely delivery with AdminDroid's Scheduling to your email anytime you need.
Delivering Reports on Time
Schedule tailored reports to execute automatically at the time you set and deliver straight to the emails you choose. In addition, you can customize report columns and add inteligent filtering to the activities just from the previous day to suit your Microsoft 365 report requirements.
Set It, Schedule It, See Results- Your Reports, Your Way, On Your Time!
Time Saving
Automation
Customization
Intelligent Filtering
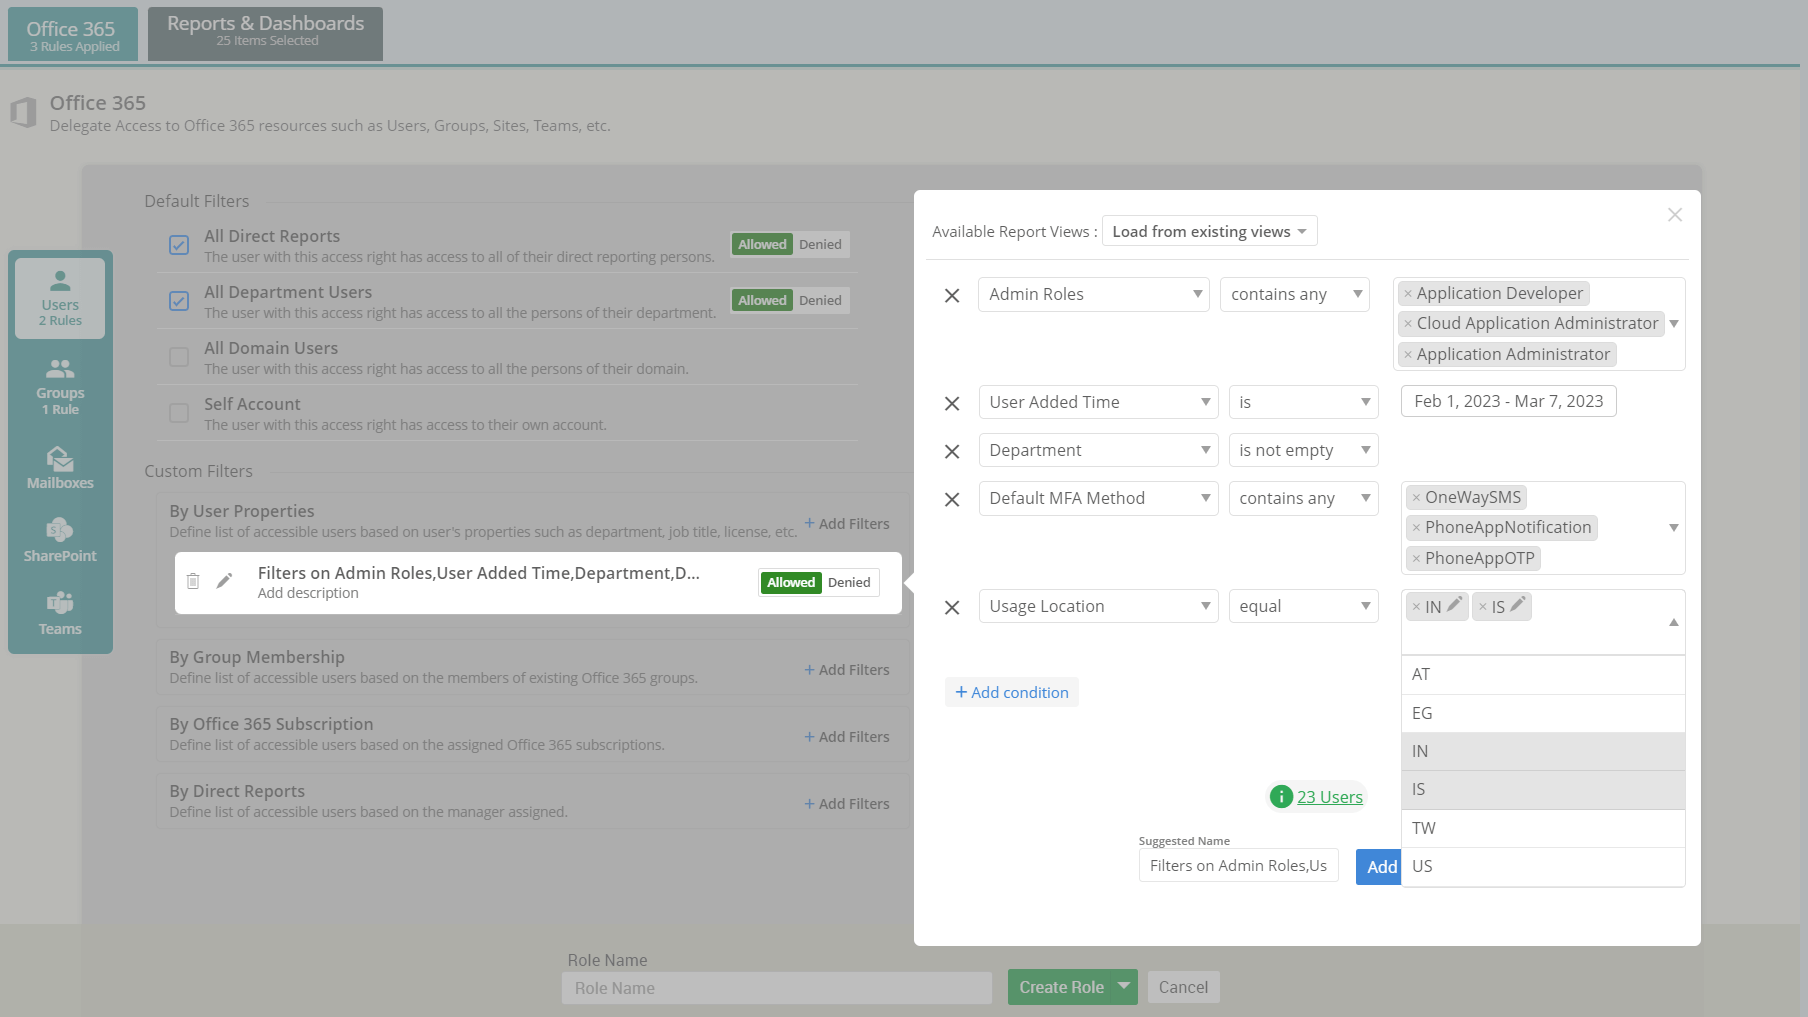
Give Just the Right Access to the Right People
Grant fine-tuned access to any Microsoft 365 user with AdminDroid’s Granular Delegation and meet your organization’s security and compliance requirements.
Give Just the Right Access to the Right People
Create custom roles loaded with just the right permissions and give access to admins or normal users within AdminDroid. The result? A streamlined Microsoft 365 management experience that aligns your organization's security protocols and saves your invaluable time and effort.
Align, Define, Simplify: AdminDroid's Granular Delegation
Smart Organizational Control
Effortless M365 Management
Simplified Access
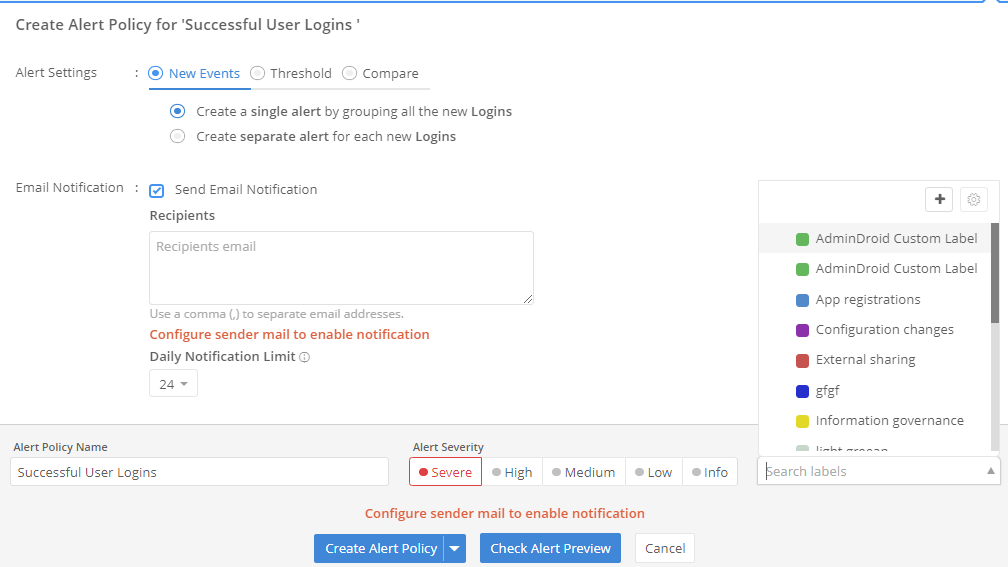
Advanced Alerts at a Glance
Receive quick notifications for malicious Microsoft 365 activities. Engage with the AdminDroid’s real-time alert policies crafted to streamline your security investigations.
Advanced Alerts at a Glance
Stay informed of critical activities like suspicious emails and high-risk logins, bulk file sharing, etc. Through creating and validating ideal alert policies, AdminDroid provides a comprehensive approach to real-time monitoring and management of potential threats within your organization.
AdminDroid Keeps You Always Vigilant, Never Vulnerable!
Proactive Protection
Real-time Monitoring
Security Intelligence
Threat Detection
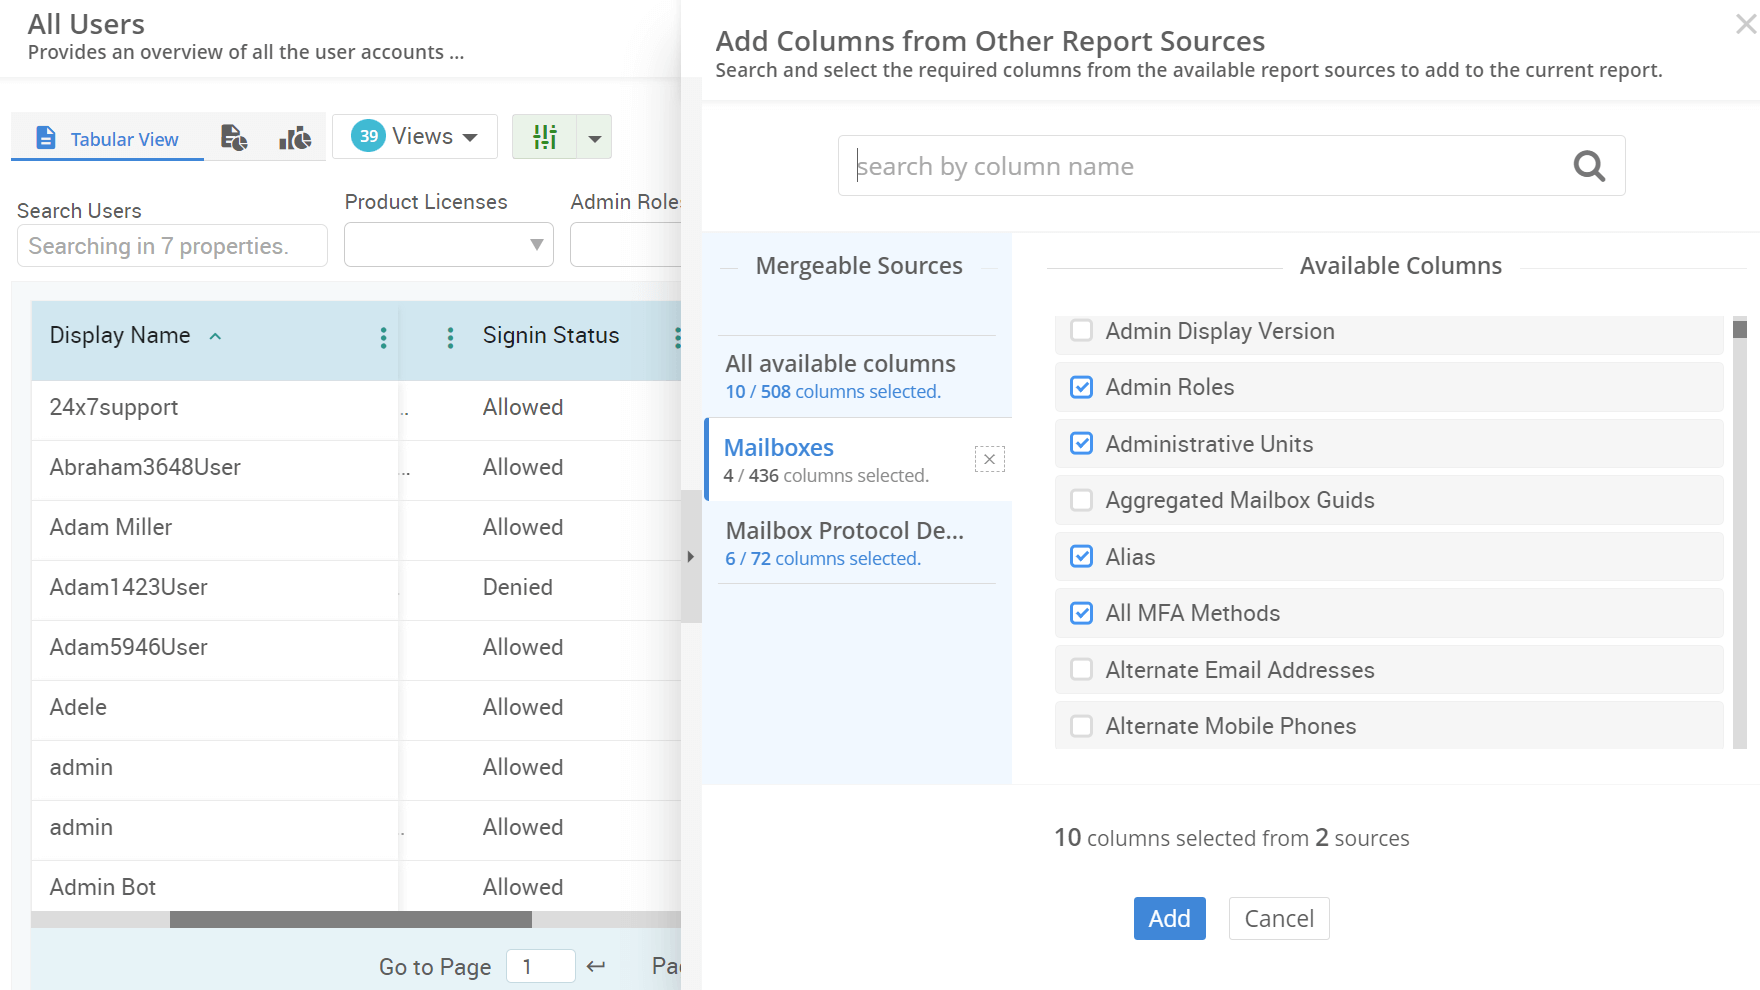
Merge the Required Data to One Place
Combine multiple required columns into one comprehensive report and prioritize the information that matters most to you with AdminDroid’s Advanced Column Customization.
Merge the Required Data to One Place
This column merging capability offers a flexible way to add different columns from various reports and collate all the essential data in one place. Want to revisit the customized report? Save it as a 'View’, and your unique report is ready whenever you need it.
Merge with Ease and Save as Views!
Custom Reporting
Unique View
Desired Columns
Easy Data Interpretation
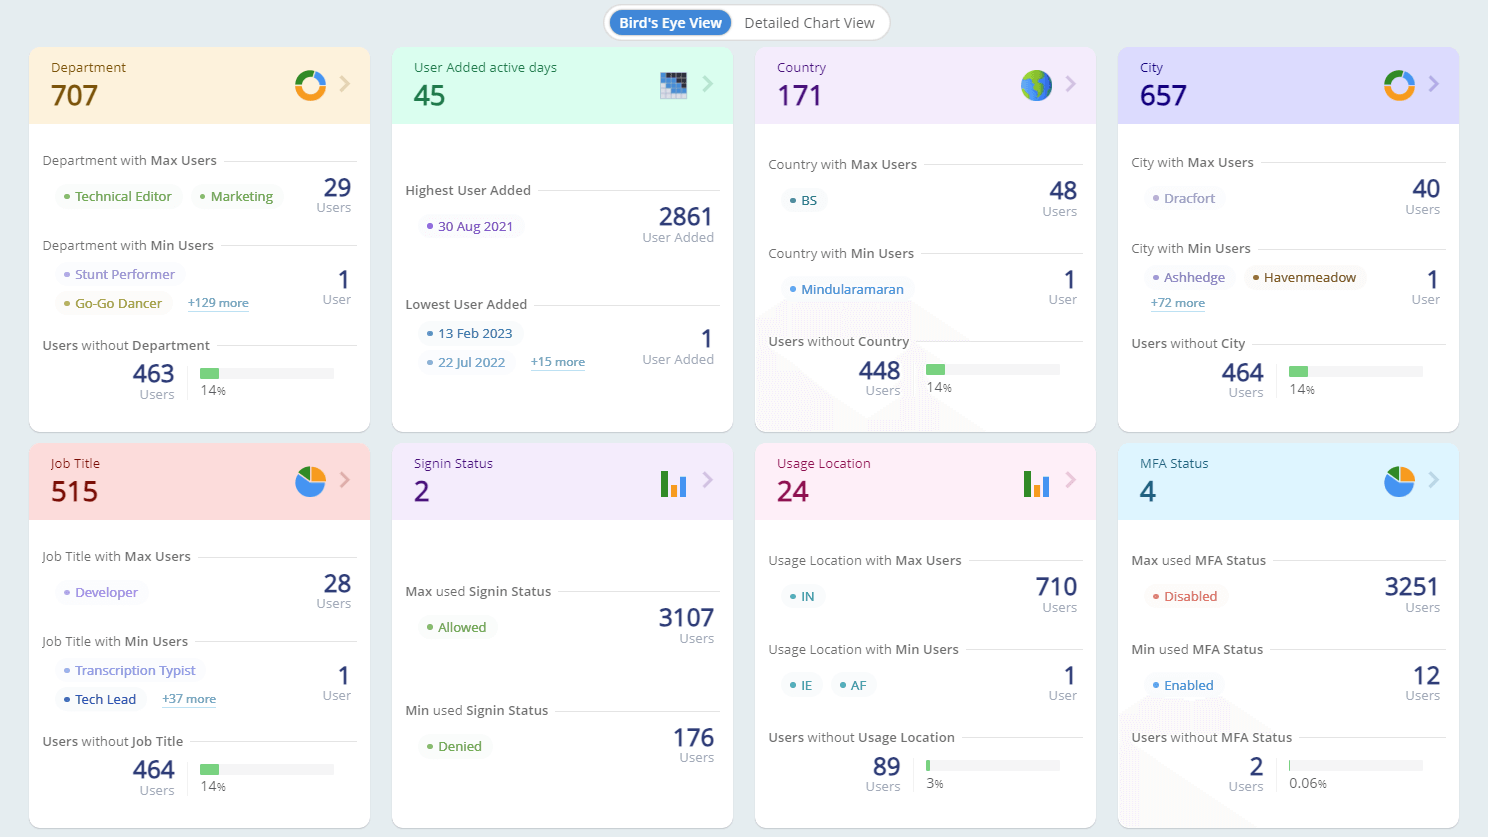
Insightful Charts and Exclusive Dashboards
Get a quick and easy overview of your tenant's activity, identify potential problems, and take action to protect your data with AdminDroid’s Charts and Dashboards.
Insightful Charts and Exclusive Dashboards
With AdminDroid charts and dashboards, visualize your Microsoft 365 tenant in ways you've never thought possible. It's not just about viewing; it's about understanding, controlling, and transforming your Microsoft 365 environment.
Explore Your Microsoft 365 Tenant in a Whole New Way!
Executive overviews
Interactive insights
Decision-making
Data Visualization
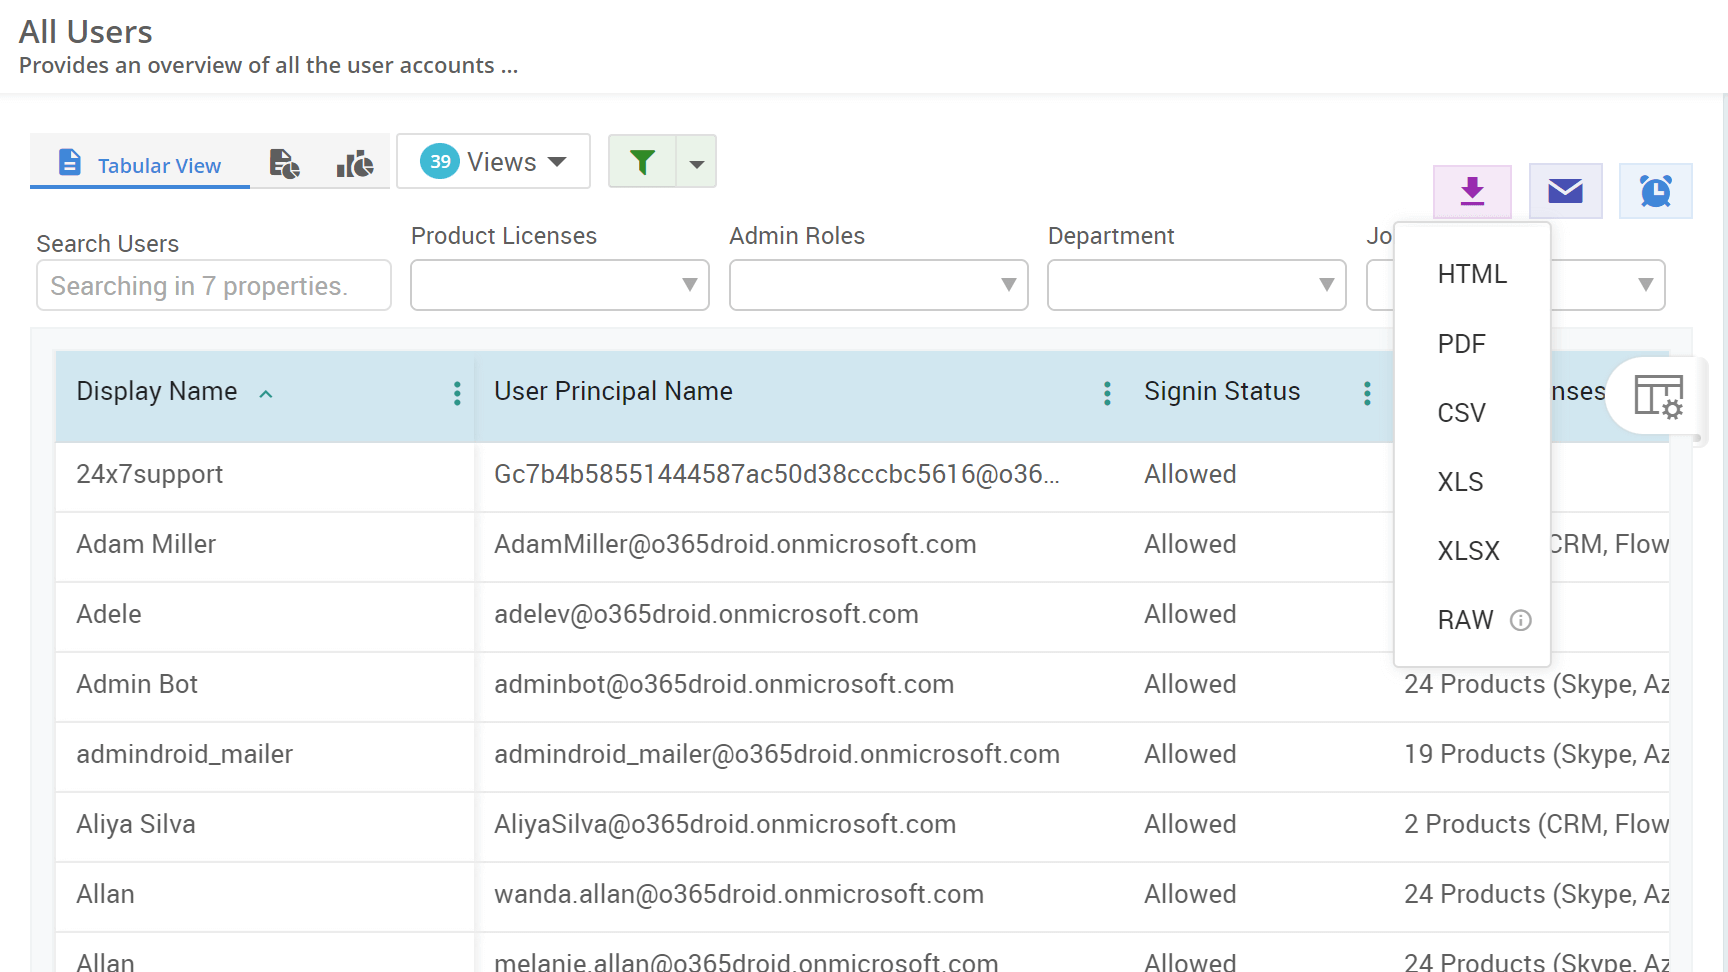
Efficient Report Exporting for Microsoft 365
Downloading your reports in the right file format shouldn’t be a hassle with AdminDroid’s Report Export. Experience seamless report exporting in various formats that cater to your needs.
Efficient Report Exporting for Microsoft 365
Navigate through diverse options and export Microsoft 365 reports flawlessly in your desired file format. Tailor your reports precisely as you need them and save them directly to your computer.
Take Control, Customize and Deliver- Your Office 365 Data, Exported in Your Way!
Easy Export
Seamless Downloading
Data Control
Manage Microsoft 365

Get AdminDroid Office 365 Reporter Now!