🎉 Our Office 365 Reporting Tool is now available in Azure Marketplace 🚀
This website uses cookies to improve your experience. We'll assume you're ok with this. Know more.
SharePoint Online

How to Find Inactive SharePoint Online Sites in Microsoft 365

As your teams work on various projects, unused SharePoint sites can accumulate over time. These sites become repositories of outdated information, creating clutter and consuming storage. Manually sifting through all your sites to find underutilized ones is a time-consuming and error-prone process. This guide helps you to identify inactive SharePoint online sites, freeing up space and improving your organization’s overall SharePoint experience.

Using SharePoint Admin Center

Microsoft 365 Permission Required
SharePoint Admin Least Privilege
Global Admin Most Privilege
  • Navigate to the Active sites page in your SharePoint admin center.
  • Click on the "Last activity" column to sort sites from oldest to newest.
  • The sites at the top of the list are the ones that haven't been used in a while.
  • The Last activity column shows the date when a file was last modified or when a page was last viewed on the site.
Using SharePoint Admin Center
  • Note: You cannot export the details of inactive sites from this page. However, if you need to export this information, you can utilize the SharePoint site usage report available in the Microsoft 365 admin center.

Using PnP PowerShell

Microsoft 365 Permission Required
SharePoint Admin Least Privilege
Global Admin Most Privilege
  • While there isn't a specific PowerShell cmdlet available for identifying inactive SharePoint Online sites, you can leverage the below properties.
  • LastContentModifiedDate – It shows the recent timestamp when content on the site was last modified.
  • LastItemModifiedDate – This property gets the timestamp of site changes made by the user and system.
  • LastItemUserModifiedDate – This date is the most accurate representation of the last user activity on a site.
  • You can run the below script to get SharePoint sites based on last modified date. Then, review the dates to identify inactive sites.
  • Windows PowerShell Windows PowerShell
     $credentials = Get-Credential
      function Connect-PnPOnlineWithCreds {
          param ( [string]$siteUrl )
          Connect-PnPOnline -Url $siteUrl -Credentials $credentials }
     $adminUrl = "<AdminURL>"
      Connect-PnPOnlineWithCreds -siteUrl $adminUrl -Interactive
      $sites = Get-PnPTenantSite
      $siteData = @()
      foreach ($site in $sites) {
          try {
            $siteURL = $site.Url
              Connect-PnPOnlineWithCreds -siteUrl $siteURL
              $web = Get-PnPWeb -Includes LastItemModifiedDate
              $webuser = Get-PnPWeb -Includes LastItemUserModifiedDate
              $siteData += [PSCustomObject]@{             SiteUrl = $site.Url
                  LastContentModifiedDate = $site.LastContentModifiedDate
                  LastItemModifiedDate = $web.LastItemModifiedDate
                  LastItemUserModifiedDate = $webuser.LastItemUserModifiedDate          }
          } catch {
              Write-Host "Failed to retrieve data for $($siteURL): $_" }  }  $siteData
  • Replace <AdminURL> with your SharePoint Online admin center URL.
  • Note: You may receive the error message "Failed to retrieve data for <SiteURL>: Attempted to perform an unauthorized operation." for sites to which you don't have access.

Streamline your SharePoint environment by identifying and managing inactive sites

AdminDroid's SharePoint Online management tool offers an all-in-one solution for SharePoint administration. It goes beyond native tools, giving you vital stats on site usage & storage, site users, site permissions, and site collections through insightful reports. This helps you optimize storage, consolidate underused sites & inactive users, and manage access permissions – all for a more efficient SharePoint Online experience.

Schedule Automated Reports for Proactive Management

Schedule inactive SharePoint sites report to get regular updates of all inactive sites periodically in the mailbox of designated recipients.

Monitor Inactive SharePoint users to Optimize Resources

Just like inactive sites, Inactive SharePoint users also increase administrative overhead. Analyze and remove inactive SharePoint users to optimize SharePoint storage and licensing costs.

Setup Real-Time Alerts to Safeguard Confidential Data

Prevent unauthorized access to inactive sites by receiving instant notifications on Permission level changes using AdminDroid alerts.

Consolidate Your SharePoint Site Reports in One Place

Simplify your inactive site reporting process by accessing all site activity and usage reports in a single, unified view under ReportBoards.

Audit Site Collection for Enhanced Control

Maintain a comprehensive audit trail of site collection reports for the deletion of inactive sites to ensure compliance and accountability.

Delegate Tasks without Compromising Security

Delegate Manage Owned Sites built-in role to site owners to manage all details of sites without granting full admin privileges.

AdminDroid gives you a central view of every change in your SharePoint Online environment. See how sites are used with detailed analytics on storage, user activity, permissions, and sharing. It also analyzes storage trends to optimize allocation across SharePoint, OneDrive, and Teams, preventing storage issues and unnecessary costs. Manage your environment efficiently and pay only for what you use.

Explore a full range of reporting options

Important Tips

Check site storage usage regularly to identify underutilized sites and optimize your SharePoint Online environment.

Archive SharePoint sites with valuable data that are not actively used to free up storage while keeping essential information.

Limit external sharing of sites to prevent unauthorized usage and protect sensitive content on inactive sites.

Common Errors and Resolution Steps

The following are possible errors and troubleshooting hints while dealing with SharePoint Online sites:

Error Bad Request - Header Field Too Long
HTTP Error 400. A request header field is too long.

This issue might occur if you try to access a SharePoint Online site many times in a short period. This adds too many cookies to the request. This, in turn, causes the HTTP request header to become too large.

Fix A large number of cookies can cause the header to exceed size limits. Follow your browser's instructions for clearing cache and cookies, then close all browser windows and reopen.

Error No connection available. Use Connect-SPOService before running this Cmdlet.

This error occurs in Microsoft PowerShell when you try to use a SharePoint Online (SPO) cmdlet without first establishing a connection to your SharePoint Online environment.

Fix Use the below cmdlet with your SharePoint Online credentials to establish a connection before running any other SPO cmdlets.
Connect-SPOService

Error AADSTS65001: The user or administrator has not consented to use the application with ID ‘31359c7f-bd7e-475c-86db-fdb8c937548e’ named ‘PnP Management Shell’. Send an interactive authorization request for this user and resource.

The error occurs in PowerShell because you haven't granted permission for the PnP Management Shell app (identified by its ID) to access your Microsoft 365 resources.

Fix To grant permission to this PnP Management Shell, run the below PowerShell cmdlet as a Global Administrator. You’ll be prompted to consent to a set of permissions. Click on the “Consent on behalf of your organization” and then click on the “Accept” button.
Register-PnPManagementShellAccess

Error Get-SPOSite: The managed path sites/URL is not a managed path in this tenant.

This error occurs in PowerShell because of the “/” character at the end of the $SiteURL parameter.

Fix Remove the trailing slash as SharePoint URLs don't include a trailing slash for site collections. Double-check that the value assigned to $SiteURL is accurate and matches the actual SharePoint site URL because typos or incorrect paths can also cause this error.

Frequently Asked Questions

List All Unused SharePoint Online Sites to Optimize Storage in Microsoft 365

How to manage inactive sites using the site lifecycle policy?

How to manage inactive sites using the site lifecycle policy? +

Identifying and managing inactive SharePoint sites is crucial for maintaining optimal performance and storage. As the number of sites grows over time, finding inactive ones can become increasingly challenging. To streamline this process, you can use the Site Lifecycle Management feature, which automatically identifies inactive sites periodically.

You need to create an inactive site policy that defines when a site should be considered inactive and what sites are included & excluded in the policy. By utilizing these policies, organizations can improve overall efficiency and productivity.

How to Create an Inactive Site Policy in SharePoint?

Prerequisite: Microsoft SharePoint Premium - SharePoint Advanced Management add-on license is required to use this feature.

To automate inactive site management and optimize your SharePoint environment, follow these steps to create an inactive site policy:

  • Log in to the SharePoint admin center.
  • Navigate to Policies»Site lifecycle management.
  • Click on + Create policy and then select ‘Next’.
  • Enter your policy scope parameters and select Next to proceed.
  • Provide a name for your policy, optionally add a description, and select a policy mode.
  • Click 'Next' and then Done.
    Your inactive site policy is now successfully created.
inactive-site-policy-scope
site-inactive-policy-name

How does the Inactive Site lifecycle Policy Work?

This policy will notify SharePoint site owners when the site has been inactive for certain months as per the duration set under the policy scope. Owners can still be able to certify their site as active using the Certify site button in the email notification prompts.

Once certified, the policy stops checking the site activity for one year. If a site is confirmed inactive, you can either delete or archive it to optimize storage and enhance performance.

Automate inactive site reporting with AdminDroid’s advanced scheduling feature for effective management!

  • Utilize the schedule feature on the Inactive Sites report to receive regular updates on inactive sites, eliminating the need for Microsoft SharePoint Premium.
  • This feature allows you to email the reports in any preferred format to the designated SharePoint admins, site owners, or other recipients.
inactive-sites-scheduling

How can I archive inactive SharePoint sites?

How can I archive inactive SharePoint sites? +

In SharePoint environments, inactive sites occupy valuable storage space. However, simply deleting these sites isn't always an option, especially if they contain important data.

Archiving inactive SharePoint sites allows you to free up storage while preserving essential information for future reference. Microsoft 365 Archive offers a cold storage tier that securely retains inactive sites within SharePoint at a cost-effective rate, aligning with the data’s lifecycle stage.

Archive Inactive Sites using SharePoint Admin Center

  • Navigate to the Active sites page on the SharePoint admin center.
  • On the list, select the site you want to archive and click Archive.
  • Click "Archive" again in the confirmation prompt.

Your archived site will appear on the ‘Archived sites’ page on the SharePoint admin center.

Note: Before archiving an inactive site, you need to enable Microsoft 365 Archive from the Microsoft 365 admin center.

archive-spo-sites

Archive Inactive Sites using SPO PowerShell

To run the cmdlet below, you need to be the SharePoint administrator or Global administrator. You also have to be the site collection admin for the specific site you want to archive.

  • Connect to SharePoint Online using the below command.
    Connect-SPOService
  • Run the following cmdlet to archive a site.
    Set-SPOSiteArchiveState <SiteURL> -ArchiveState Archived
  • To reactivate the archived site, you can use the cmdlet below.
    Set-SPOSiteArchiveState <SiteURL> -ArchiveState Active

How to Manage Inactive SharePoint Sites: Archiving or Deleting?

Archiving an inactive SharePoint site allows you to preserve its content and structure while making it read-only. This process is beneficial for retaining valuable data or complying with data retention policies without completely removing the site.

However, for sites that are outdated or no longer needed, deleting them might be a preferable option. Deleting removes the site and all its data permanently, which can help free up significant storage space and reduce administrative overhead. This ensures that only relevant and active sites remain, reducing clutter in the SharePoint environment and optimizing performance.

By carefully considering your organization's needs, you can effectively manage inactive sites through archiving or deletion to optimize storage and ensure compliance.

How to delete an unused SharePoint site in M365?

How to delete an unused SharePoint site in M365? +

Inactive SharePoint sites may affect compliance, pose security risk, and reduce overall user experience. Cleaning them up can:

  • Optimize storage utilization
  • Improve data retrieval efficiency
  • Enhance security
  • Reduce operational costs

Depending on the administrative permissions, the deletion process of the site varies:

Deleting a site as a Site Admin


  • Navigate to the unused SharePoint site you want to delete.
  • Click on the Settings at the top of the site and then choose ‘Site information'.
  • At the bottom of the Site Information panel, click ‘Delete site’.
  • A confirmation window will appear. Confirm it and then select Delete.
sharepoint-online-spo-site-deletion

Deleting a site as a SharePoint Admin or
Global Admin


  • Go to the Active sites page on the SharePoint admin center.
  • Select the inactive site you want to delete from the list.
  • Click the ‘Delete’ button at the top of the page.
  • Confirm the deletion by clicking Delete in the confirmation prompt.
sharepoint-site-deletion-spo-admin-center

Delete Inactive SharePoint Sites using PowerShell

Quickly remove inactive SharePoint sites with these simple PowerShell commands.

  • Connect to SharePoint Online using the below command.
    Connect-SPOService
  • Execute the following cmdlet to delete the specified site.
    Remove-SPOSite -Identity <SiteURL>

Note: Replace <SiteURL> with the actual URL of the site you wish to delete.

Audit suspicious site deletions instantly using AdminDroid’s comprehensive reports!

  • The Site Collection Deleted report provides a record of all deleted SharePoint sites in your tenant.
  • This report facilitates quick identification of accidentally deleted sites, enabling potential recovery efforts when necessary.
  • It offers advanced filtering functionalities, allowing focused exploration on specific sites or users responsible for deletions.
deleted-site-collection-report

How to generate a SharePoint Online site usage report in M365?

How to generate a SharePoint Online site usage report in M365? +

The SharePoint site usage report is essential for organizations to understand how their SharePoint sites are utilized. It provides valuable insights into content popularity and overall site performance. This report helps you to:

  • Monitor site engagement
  • Assess site performance
  • Ensure compliance
  • Optimize resource allocation
  • Identify inactive sites

You can generate usage insights on SharePoint sites from various sources.

  • Using Microsoft 365 Admin Center
  • Using SharePoint Online
  • Using PowerShell

Track Site Usage using the M365 Admin Center

  • Navigate to the Usage reports section in the Microsoft 365 admin center.
  • From the Reports pane, choose ‘SharePoint’ and then click on Site usage. This section provides an overview on.
    • The total number of active SharePoint sites per day.
    • The total number of active SharePoint files per day.
    • The amount of SharePoint storage used each day.
    • The number of SharePoint pages viewed per day.
  • Scroll down to access detailed insights into site activities, including information on the last active date for each SharePoint site.
  • To perform deeper analysis, export the report as a CSV file using the Export option available in the report interface.
site-usage-admin-center

Leverage SharePoint Site Usage Analytics

  • Open the specific SharePoint site for which you want to analyze usage metrics.
  • Navigate to the Settings»Site usage to access detailed analytics.
  • Review the site usage analytics dashboard to examine metrics such as unique viewers, site visits, usage insights by time & device, and average time spent per user over the last 7, 30, and 90 days.
  • To perform deeper analysis, export the site usage data as a CSV file using the download option available.
site-usage-sharepoint-online

Analyze SharePoint Site Usage using PowerShell

  • Connect to Microsoft Graph using the following command.
    Connect-MgGraph -Scope 'Reports.Read.all'
  • Retrieve the detailed site usage information using the cmdlet below.
    Invoke-MgGraphRequest -Uri "https://graph.microsoft.com/v1.0/reports/getSharePointSiteUsageDetail(period='D180')" -OutputFilePath <"FilePath">

Replace <"FilePath"> with the actual path where you want the report to be exported.

sharepoint-site-usage-output

Tip: For analyzing overall SharePoint usage trends across your organization, leverage the Microsoft admin center. However, to gain deeper insights into how specific sites are being utilized, navigate directly to the desired SharePoint site and explore its usage analytics.

Go beyond the basic site usage reports with AdminDroid’s powerful analytics report!

Gain a clear understanding of how sites within your SharePoint Online environment are being used in a single click with the SharePoint Online Usage Reports available in AdminDroid. These reports provide insights into daily file activity, active users, file sharing summary, and site storage.

What are the differences between the LastItemModifiedDate and LastItemUserModifiedDate?

What are the differences between the LastItemModifiedDate and LastItemUserModifiedDate? +

Determining site inactivity in SharePoint Online can be challenging due to the limited available data and cmdlets. While properties like LastItemModifiedDate and LastItemUserModifiedDate provide insights into site activity by tracking recent modifications, they differ in the types of changes they record.

LastItemModifiedDate

This property captures the timestamp of the latest modification to any item within a SharePoint site, helping to gauge the site’s engagement level. This includes changes initiated by:

  • User Activities: Site page changes, site content updates, site sharing settings changes, theme modifications, site name/description changes, and so on.
  • System Processes: Automated workflows, scheduled tasks, and background maintenance operations.
  • External Integrations: Modifications triggered by third-party applications connected to SharePoint.

LastItemUserModifiedDate

This property specifically captures the timestamp of recent user modifications to site content, such as page updates and content updates. It reflects actual user interaction with the site and is valuable for identifying sites with minimal user engagement. This excludes changes made by the System processes and External Integrations.

Some other properties that indicate the site's inactivity are listed below for your reference.

  • LastContentModifiedDate: This property tracks the recent changes to the site pages, metadata, templates, appearance, views, and settings.
  • Last Activity Date: This property reflects the most recent file activity on the site, as well as the page views.

Understanding these differences between ‘LastItemModifiedDate’ and ‘LastItemUserModifiedDate’ is crucial for effectively managing and reporting on site activity. It allows you to distinguish between user-driven changes and system-generated modifications.

How to restore a deleted SharePoint site?

How to restore a deleted SharePoint site? +

Have you accidentally deleted a crucial SharePoint site or discovered that an important site was deleted without your knowledge? There's a good chance you can recover it. Follow the below steps to restore the deleted site and its content.

Things to consider before you restore:

  • Permissions: You must be a Global Administrator or a SharePoint Administrator to restore a deleted site.
  • Time Limit: Restore within 93 days of deletion.
  • Group Connected sites: After 30 days, group resources are permanently deleted, though site structure can still be restored.

Restore a Deleted SharePoint Site using SPO Admin Center

  • Navigate to the Deleted sites page.
  • Pick the site that you want to restore.
  • Click Restore.
  • Confirm by clicking ‘Restore’ again in the confirmation process.
restoring-sharepoint-site

Restore Deleted SharePoint Sites using PowerShell

  • Connect to SharePoint Online using the below cmdlet.
    Connect-SPOService
  • Verify the site collections that are available for restoration by running the cmdlet below.
    Get-SPODeletedSite
  • Copy the Site URL of the site collection you want to restore, from the results returned by the previous cmdlet.
  • Provide the Site URL to this PowerShell command to restore a SharePoint Online deleted site collection from the Recycle Bin.
     Restore-SPODeletedSite -Identity <SiteURL>

Can I Restore a Deleted Subsite in SharePoint Online?

Yes, you can restore a deleted subsite in SharePoint Online, but you'll need to act quickly. SharePoint retains the subsite for only 93 days, and after that, they may be permanently lost.

  • Login to SharePoint Online Site as a site administrator.
  • Navigate to the Site settings»Site contents and select Recycle bin.
  • Access the "Second-stage recycle bin" by clicking the link at the bottom of the page.
  • Select the subsite and click on the Restore button.

Handy Tips:

  • Limit deletion rights to trusted individuals using SharePoint site permissions.
  • Reducing access helps in preventing accidental or malicious deletion.
  • Find out who deleted a site using the 'Deleted by' column on the Deleted sites page.

+

Kickstart Your Journey With
AdminDroid

Your Microsoft 365 Companion with Enormous Reporting Capabilities

Download Now
User Help Manuals Compliance Docs
x
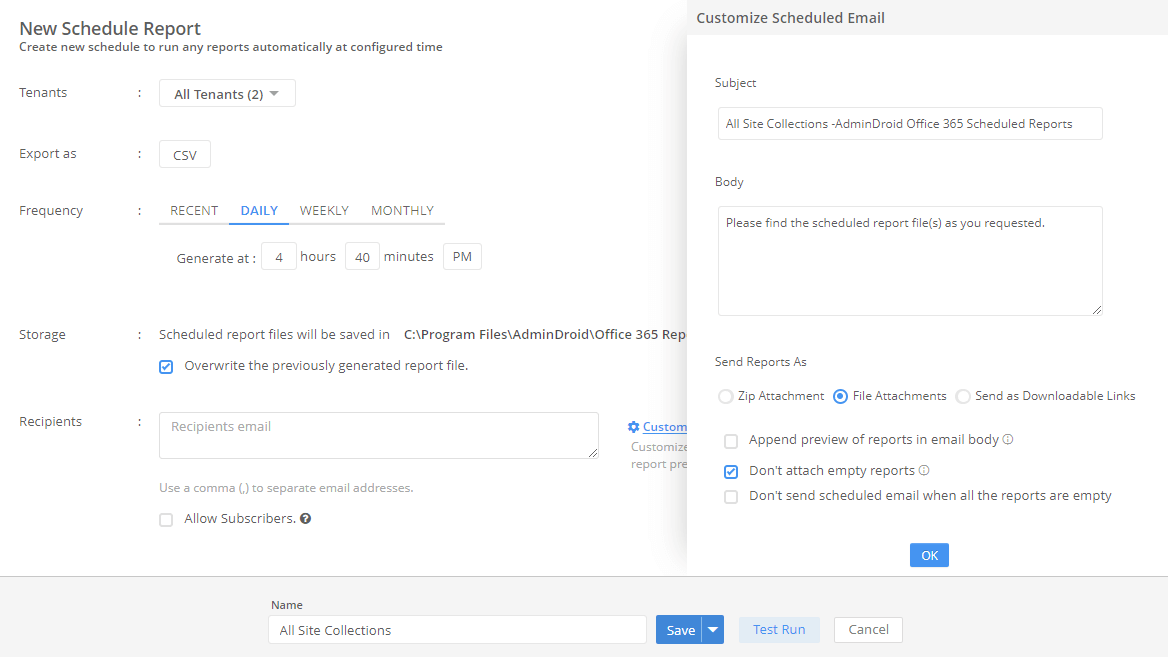
Delivering Reports on Time
Want a desired Microsoft 365 reports every Monday morning? Ensure automated report distribution and timely delivery with AdminDroid's Scheduling to your email anytime you need.
Delivering Reports on Time
Schedule tailored reports to execute automatically at the time you set and deliver straight to the emails you choose. In addition, you can customize report columns and add inteligent filtering to the activities just from the previous day to suit your Microsoft 365 report requirements.
Set It, Schedule It, See Results- Your Reports, Your Way, On Your Time!
Time Saving
Automation
Customization
Intelligent Filtering
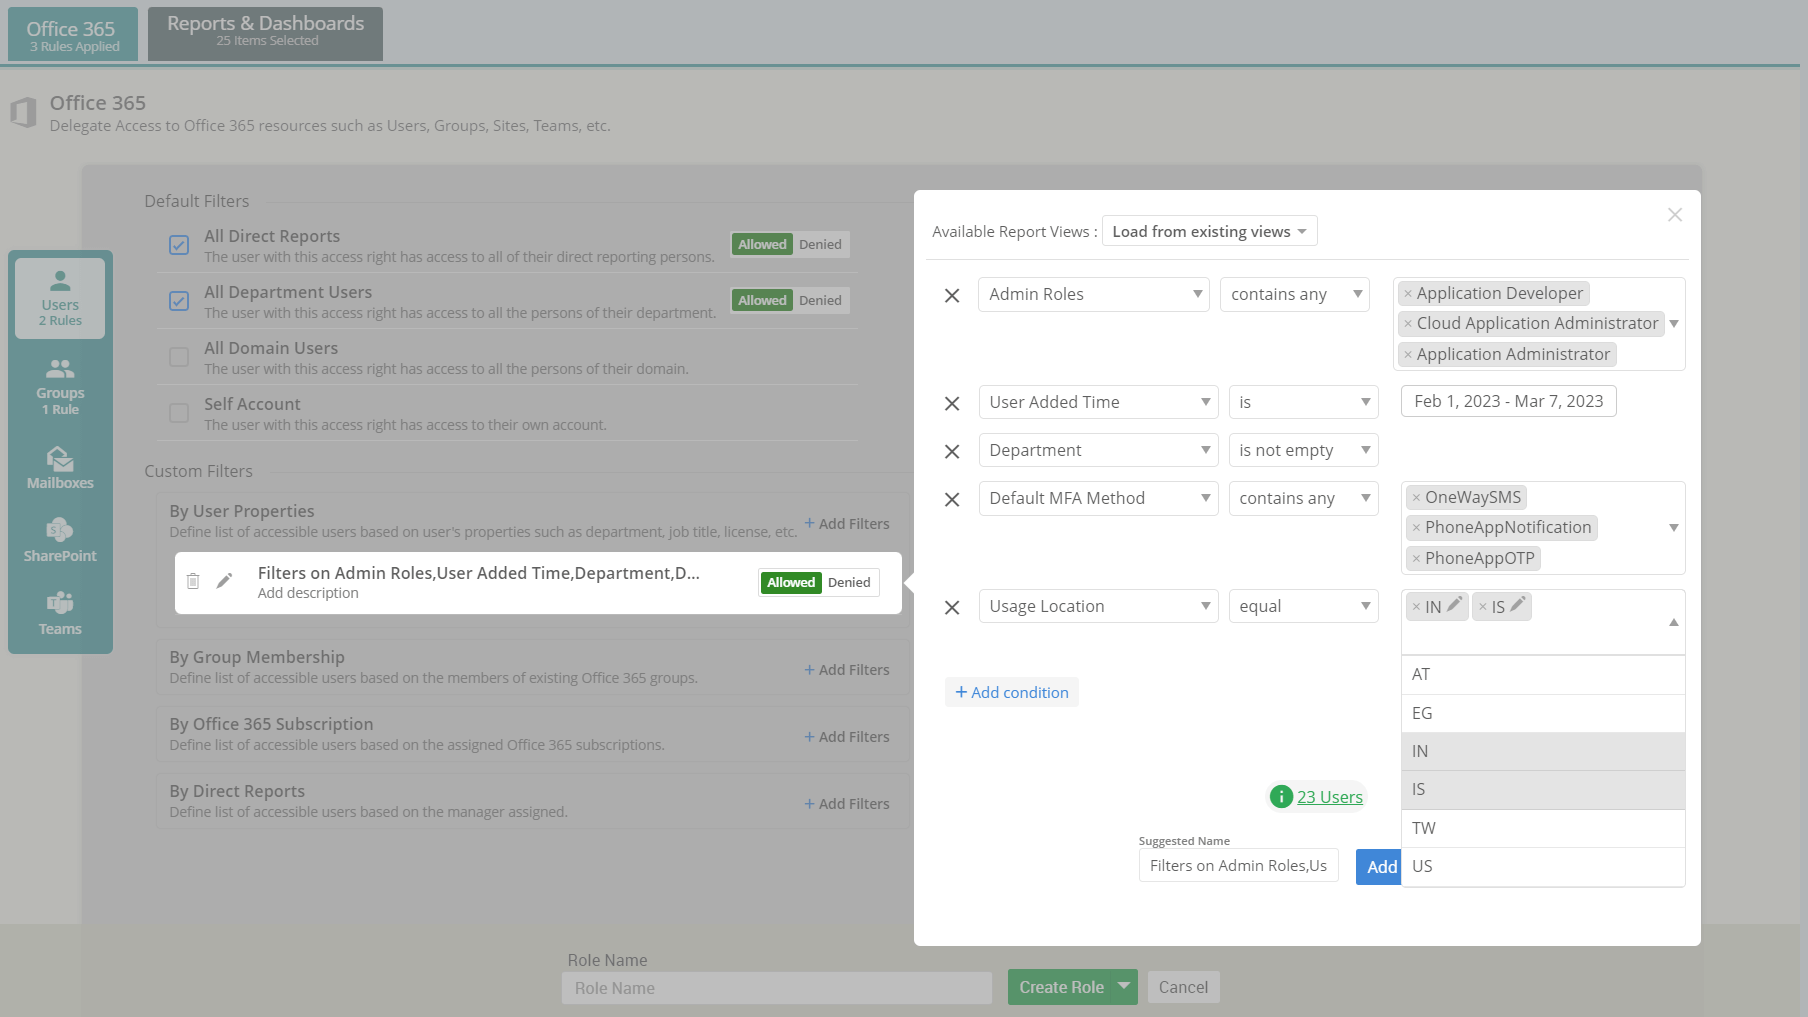
Give Just the Right Access to the Right People
Grant fine-tuned access to any Microsoft 365 user with AdminDroid’s Granular Delegation and meet your organization’s security and compliance requirements.
Give Just the Right Access to the Right People
Create custom roles loaded with just the right permissions and give access to admins or normal users within AdminDroid. The result? A streamlined Microsoft 365 management experience that aligns your organization's security protocols and saves your invaluable time and effort.
Align, Define, Simplify: AdminDroid's Granular Delegation
Smart Organizational Control
Effortless M365 Management
Simplified Access
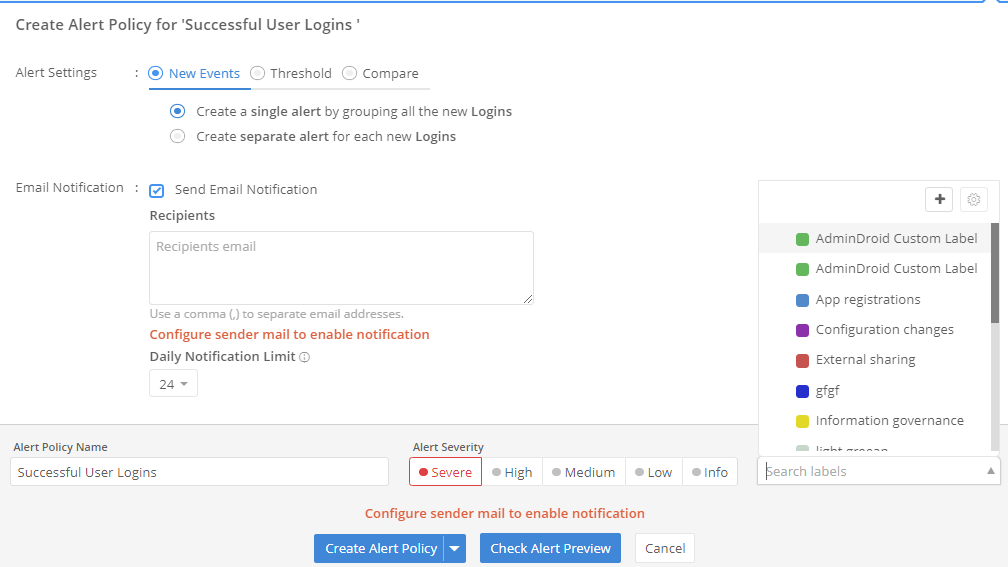
Advanced Alerts at a Glance
Receive quick notifications for malicious Microsoft 365 activities. Engage with the AdminDroid’s real-time alert policies crafted to streamline your security investigations.
Advanced Alerts at a Glance
Stay informed of critical activities like suspicious emails and high-risk logins, bulk file sharing, etc. Through creating and validating ideal alert policies, AdminDroid provides a comprehensive approach to real-time monitoring and management of potential threats within your organization.
AdminDroid Keeps You Always Vigilant, Never Vulnerable!
Proactive Protection
Real-time Monitoring
Security Intelligence
Threat Detection
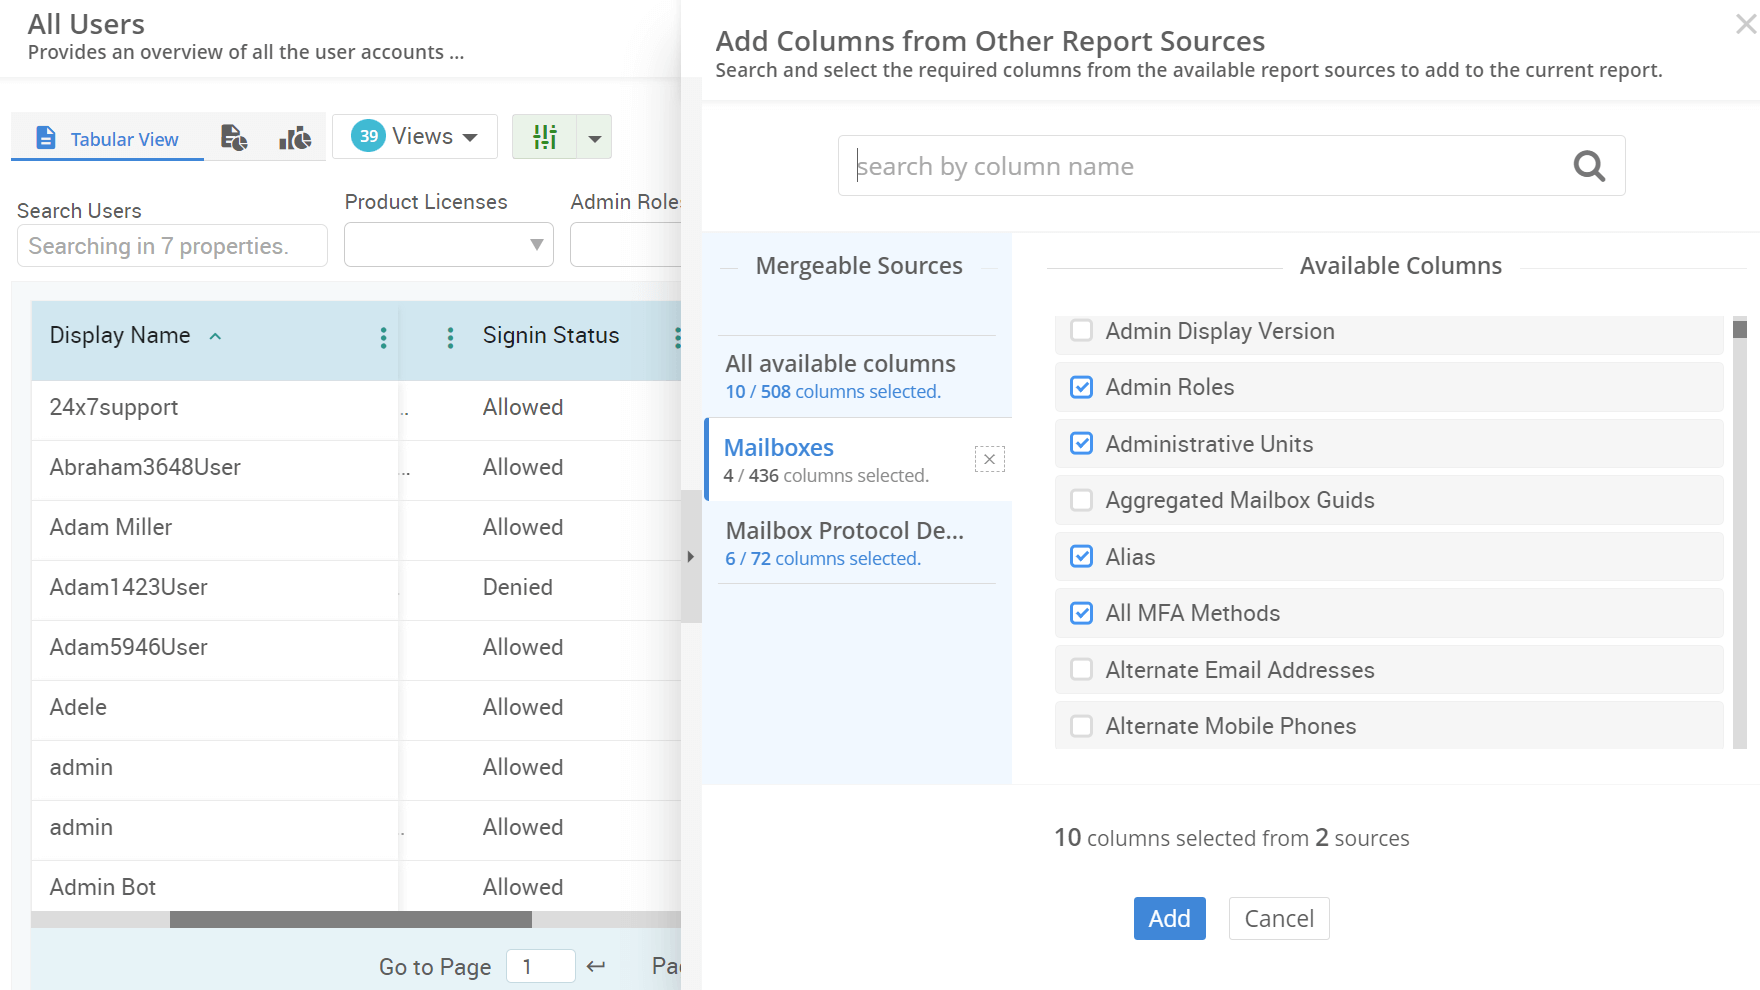
Merge the Required Data to One Place
Combine multiple required columns into one comprehensive report and prioritize the information that matters most to you with AdminDroid’s Advanced Column Customization.
Merge the Required Data to One Place
This column merging capability offers a flexible way to add different columns from various reports and collate all the essential data in one place. Want to revisit the customized report? Save it as a 'View’, and your unique report is ready whenever you need it.
Merge with Ease and Save as Views!
Custom Reporting
Unique View
Desired Columns
Easy Data Interpretation
Insightful Charts and Exclusive Dashboards
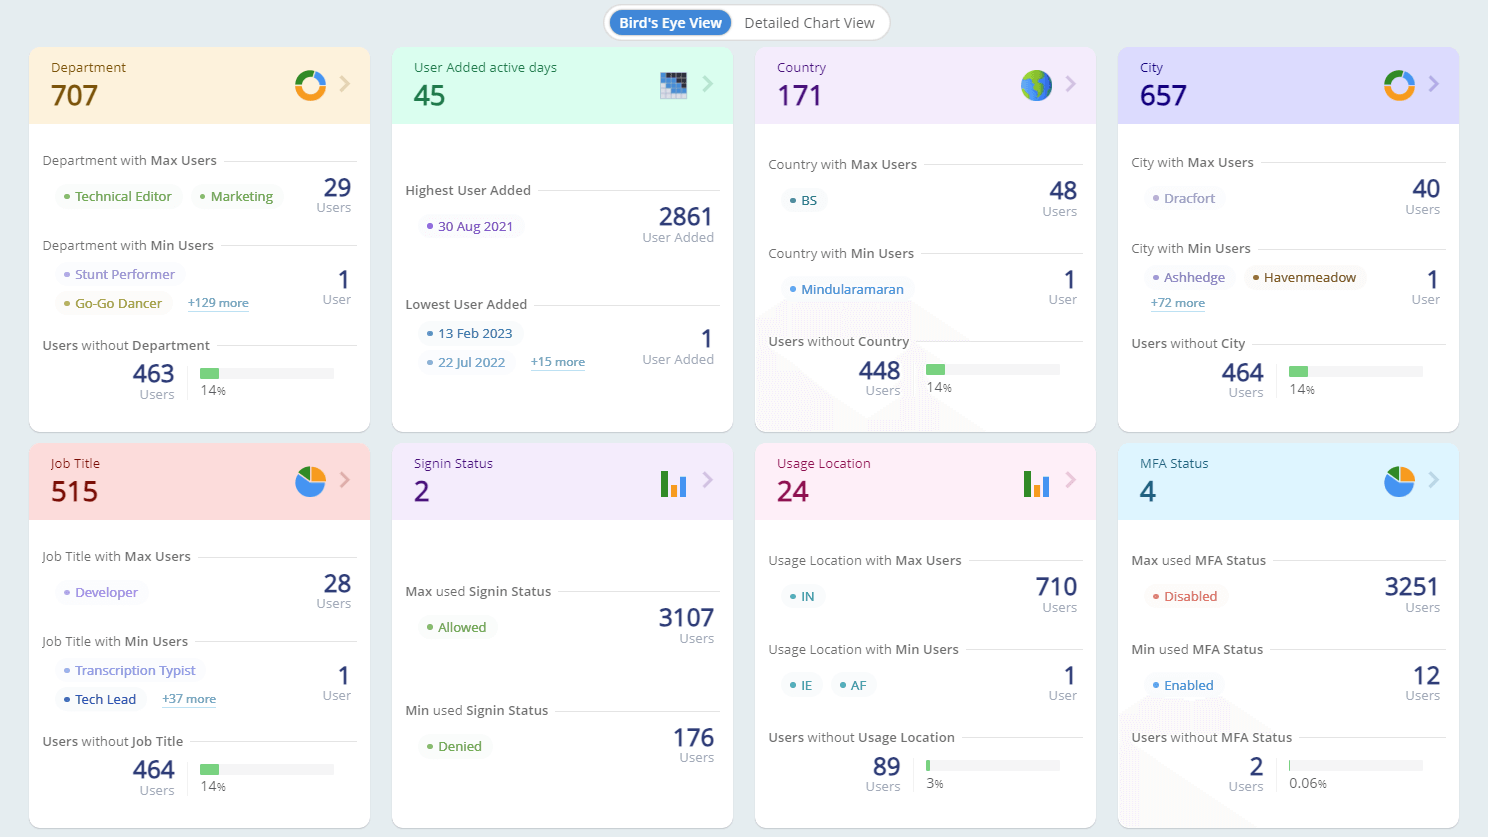
Get a quick and easy overview of your tenant's activity, identify potential problems, and take action to protect your data with AdminDroid’s Charts and Dashboards.
Insightful Charts and Exclusive Dashboards
With AdminDroid charts and dashboards, visualize your Microsoft 365 tenant in ways you've never thought possible. It's not just about viewing; it's about understanding, controlling, and transforming your Microsoft 365 environment.
Explore Your Microsoft 365 Tenant in a Whole New Way!
Executive overviews
Interactive insights
Decision-making
Data Visualization
Efficient Report Exporting for Microsoft 365
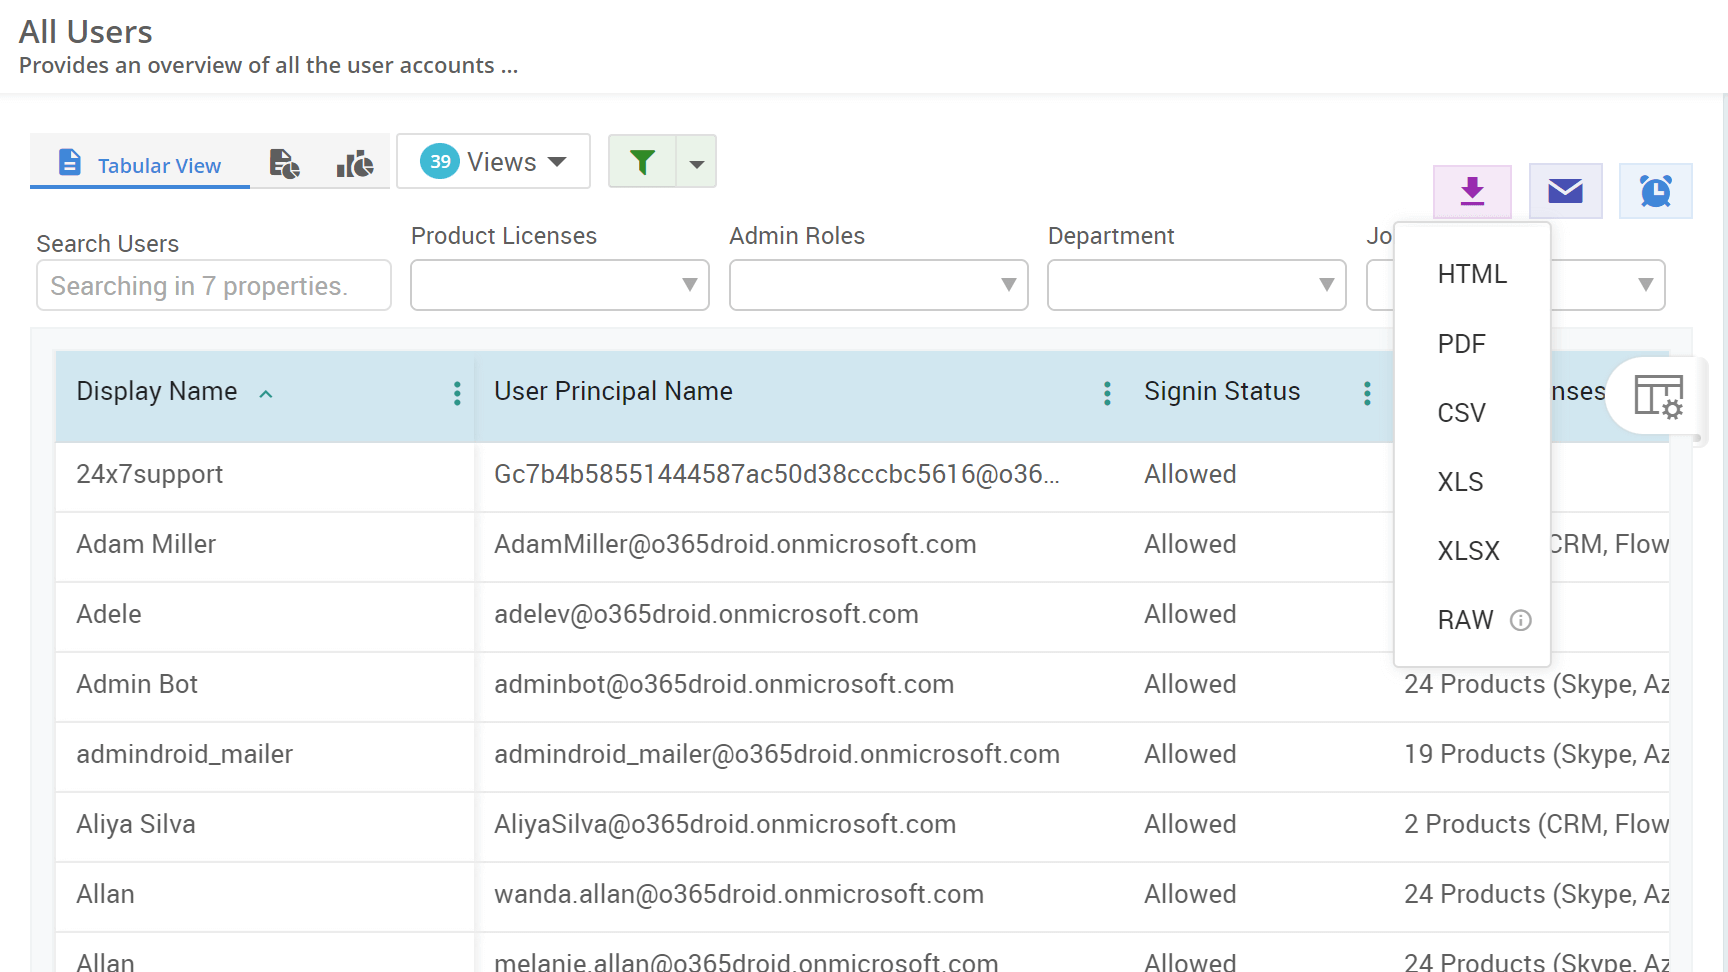
Downloading your reports in the right file format shouldn’t be a hassle with AdminDroid’s Report Export. Experience seamless report exporting in various formats that cater to your needs.
Efficient Report Exporting for Microsoft 365
Navigate through diverse options and export Microsoft 365 reports flawlessly in your desired file format. Tailor your reports precisely as you need them and save them directly to your computer.
Take Control, Customize and Deliver- Your Office 365 Data, Exported in Your Way!
Easy Export
Seamless Downloading
Data Control
Manage Microsoft 365

Get AdminDroid Office 365 Reporter Now!