🎉 Our Office 365 Reporting Tool is now available in Azure Marketplace 🚀
This website uses cookies to improve your experience. We'll assume you're ok with this. Know more.
Exchange Online

How to View Users' Inbox Rules in Exchange Online

The new Exchange admin center no longer allows Office 365 admins to view inbox rules configured by each user in their mailboxes! Many admins are seeking a way to view users' inbox rules without signing into potentially compromised mailboxes. If you're one of them, you’ve come to the right place! This guide will show you how to securely view and manage inbox rules in Microsoft 365 using other solutions, ensuring the security and integrity of your organization’s email system.

Using Exchange Online PowerShell

Microsoft 365 Permission Required
Global Admin or Exchange Admin.
  • You can view inbox rules by connecting to Exchange Online PowerShell.
  • Windows PowerShell Windows PowerShell
     Connect-ExchangeOnline
  • Run the PowerShell cmdlet below to retrieve all inbox rules in Exchange Online.
  • Windows PowerShell Windows PowerShell
     Get-Mailbox | ForEach-Object {   $mailbox = $_.PrimarySmtpAddress
    Get-InboxRule -Mailbox $mailbox | Select-Object @{Name="Mailbox";Expression={$mailbox}}, Name, Description } | Export-Csv -Path "<OutputFile>" -NoTypeInformation -Append –Force 
Using Exchange Online PowerShell

Deprecated in New Exchange Admin Center

Microsoft 365 Permission Required
Global Admin or Exchange Admin.
  • Previously, Microsoft allowed office admins to view their users' inbox rules through View another mailbox»organize email (after selecting the desired mailbox)»inbox rules in the EAC.
  • However, with the deprecation of the classic admin center, this path is no longer available in the new Exchange admin center.
  • Microsoft has not yet provided a workaround or solution for accessing inbox rules through this new interface.

Monitoring All Microsoft 365 Inbox Rules Made Easy!

AdminDroid's Exchange Online auditing tool provides insights into inbox rule configurations and operations for all Exchange Online mailboxes. This robust monitoring and auditing capability is vital for admins to uphold organizational policies, detect unauthorized access, and prevent data breaches.

Track Inbox Rules with Junk Configurations

Regularly review and adjust inbox rules with junk configurations to prevent important emails from being mistakenly filtered as junk emails.

Instant Alerts for Inbox Rule Changes

Use AdminDroid's alerting feature to detect Microsoft 365 inbox rule changes and stop unauthorized actions, such as auto-forwarding, deleting, etc.

Monitor Archive Inbox Rule Configuration Changes

Audit archive-based inbox rules to ensure compliance with data retention policies and identify potential data leakage risks.

Visualize Inbox Rules in your Microsoft 365

Easily monitor the inbox rules and its configurations with AdminDroid's AI-powered charts, enabling quick identification of outdated rules to streamline email management.

Securely Handle Forwarding Inbox Rules

Keep a close watch on all internal and external inbox forwarding rules across your organization to prevent unauthorized email forwarding to personal accounts or external addresses.

Find Enabled and Disabled Mailbox Rules

Identify all enabled and disabled inbox rules in your organization and check them for any suspicious mailbox rules that are currently enabled.

Ultimately, AdminDroid empowers admins to effectively manage Microsoft 365 mailbox rules with its detailed reports and specialized charts. It enhances visibility into inbox rule usage, enabling swift action against any suspicious activities.

Explore a full range of reporting options

Important Tips

Identify inbox rules with external forwarding in Microsoft 365 to mitigate the risk of unwanted data exposure.

Regularly audit inbox rule configuration changes to identify and revert unauthorized modifications within your organization.

Monitor unintended inbox rule changes on delegated mailboxes to prevent email flow disruption from impacting productivity.

Common Errors and Resolution Steps

The following are possible errors and troubleshooting hints for the inbox rules report in Microsoft 365.

Error The specified mailbox Identity:"Jimin@contoso.com" doesn't exist.

This error occurs when the specified user does not have the appropriate Exchange Online licenses.

Fix To fix the problem, make sure the user has the right Exchange Online licenses. You can do this by accessing the Microsoft 365 admin center»Users»Active users. From there, choose the specific user and assign the necessary licenses under "Licenses and apps." Additionally, double-check that the mailbox address is entered correctly to avoid any errors.

Error Cannot open mailbox. Server = PN3P287MB0337.INDP287.PROD.OUTLOOK.COM, mdbGuid = 92ab37a3-733e-4918-89e6-40998c5df90e, maiboxGuid = c4bc9de5-d444-40e4-8d87-b59a10d2b098

This error occurs when attempting to configure a junk-based inbox rule for another user's folder in PowerShell.

Fix To configure this inbox rule for others, delegated access to the respective mailbox is required.

Error Folder Lalisa@contoso.com:/Junk Email doesn't belong to 203589fd-e1be-4629-b101-2f17bdc55e12. You cannot move it.

This error occurs when you try to move the junk email from one mailbox to the junk folder of a different mailbox in Exchange Online PowerShell.

Fix You can only move junk email in a mailbox to its respective junk folder. For example:
New-InboxRule –Mailbox Shan@contoso.com -Name "Move to Junk" -BodyContainsWords "Offer" -MoveToFolder "Shan@contoso.com:/Junk Email" 

Error Cannot bind parameter 'RulesQuota' to the target. Exception setting "RulesQuota":The property (RulesQuota (Microsoft.Exchange.Data.ByteQuantifiedSize)) is out of range.

This error occurs when the value provided exceeds the default RulesQuota limits.

Fix Ensure the quota value is within the valid range of '32 KB (32,768 bytes)' to '256 KB (262,144 bytes)'. The actual value should be expressed in kilobytes (KB), such as '200 KB'.
Set-Mailbox -Identity "MailboxIdentity" -RulesQuota "32 KB" 

Error The term 'Get-InboxRule' is not recognized as the name of a cmdlet, function, script file, or operable program. Check the spelling of the name, or if a path was included, verify that the path is correct and try again.

This error occurs when you execute the PowerShell command without connecting to the proper modules.

Fix Connect to the Exchange Online PowerShell module using the following cmdlet.
Connect-ExchangeOnline

Frequently Asked Questions

Improve Email Integrity by Managing Inbox Rules in Microsoft 365

How to manage inbox rules for a shared mailbox?

How to manage inbox rules for a shared mailbox? +

Managing inbox rules for a shared mailbox is crucial for maintaining security and efficient workflow in Microsoft 365. Shared mailboxes are often used by various teams like sales, support, HR, etc., and they rely heavily on mailbox rules to handle emails consistently. So, it is essential to monitor and manage inbox rules on shared mailboxes.

Review Inbox Rules Using PowerShell

It's important to regularly review the inbox rules for all shared mailboxes. This helps to identify any unauthorized or suspicious rule creations. Use the following PowerShell cmdlet to retrieve all inbox rules for shared mailboxes.

Get-Mailbox -ResultSize Unlimited -RecipientTypeDetails SharedMailbox | ForEach-Object {
$mailbox = $_.PrimarySmtpAddress
Get-InboxRule -Mailbox $mailbox | Select-Object @{Name="Mailbox";Expression={$mailbox}}, Name, Description  } 

This cmdlet will list all inbox rules for each shared mailbox, providing a clear overview for administrators.

Create Inbox Rules Using PowerShell

Creating inbox rules can help manage emails efficiently. For example, you might want to flag emails of particular email types or from specific senders in shared mailboxes. Use the following cmdlet to create a new inbox rule in a shared mailbox after replacing SharedMailboxName with your shared mailbox name.

New-InboxRule "CheckActionRequired" -MyNameInToBox $true -FlaggedForAction Any -MarkImportance "High" -Mailbox "<SharedMailboxName>"

This rule flags any email where your name is in the To box and marks it as high importance. You can also create custom inbox rules using PowerShell as per your needs.

Modify Inbox Rules Using PowerShell

Sometimes, you may need to modify existing rules in a shared mailbox to better suit your needs. For instance, you might want to change the importance of flagged emails. Use the following cmdlet to modify a rule.

Set-InboxRule "CheckActionRequired" -MarkImportance "Low" -Mailbox "<SharedMailboxName>" 

Ensure to replace SharedMailboxName with your shared mailbox name before execution. This cmdlet changes the importance of the "CheckActionRequired" rule from high to low. Additionally, you can modify inbox rules based on various parameters using PowerShell.

Delete Inbox Rules Using PowerShell

To maintain security and efficiency, it's crucial to remove unnecessary or harmful rules that users might have created. Use the following cmdlet to remove an inbox rule.

Remove-InboxRule "CheckActionRequired" -Mailbox "<SharedMailboxName>" 

This cmdlet deletes the "CheckActionRequired" rule from the specified mailbox. You can also delete inbox rules using PowerShell based on various parameters.

By regularly monitoring inbox rules for shared mailboxes, Microsoft 365 admins can ensure secure and efficient email management. However, relying solely on PowerShell for managing inbox rules can be challenging, as it requires knowledge of scripting and may not offer a user-friendly interface.

To effectively keep track of shared mailbox rules without the hassle, AdminDroid offers a solution!

  • With the "Shared Mailboxes with Inbox Rules" report, admins can monitor all the inbox rules set up across the shared mailboxes in one place, simplifying the process and securing the email environment.
shared-inbox-rules-ad

How to find mailboxes with forwarding rules in Microsoft 365?

How to find mailboxes with forwarding rules in Microsoft 365? +

Monitoring mailboxes with forwarding rules is crucial for admins to prevent data leaks and unauthorized access. For example, an employee might set up a rule to forward emails containing sensitive data to an external personal account, which poses a significant security risk. Once a mailbox with suspicious forwarding rules is identified, admins can review and remove these rules or prevent the user from setting such rules.

To view all the mailboxes having forwarding rules in your Microsoft 365, use the following PowerShell script.

$mailboxes = Get-Mailbox -ResultSize Unlimited
$forwardingMailboxes = @()
foreach ($mailbox in $mailboxes) { 
  $rules = Get-InboxRule -Mailbox $mailbox.Alias
  foreach ($rule in $rules) { 
    if ($rule.ForwardTo -or $rule.ForwardAsAttachmentTo) { 
       $forwardingMailboxes += [PSCustomObject]@{ 
          Mailbox       = $mailbox.Alias
          RuleName      = $rule.Name
          ForwardTo     = $rule.ForwardTo -join ", "
          ForwardAsAttachmentTo = $rule.ForwardAsAttachmentTo -join ", "
            }
         }
     }
}
$forwardingMailboxes | Format-Table -AutoSize
forwarding-inbox-rules-faq2

While using PowerShell scripts to monitor forwarding rules is effective, it can be time-consuming. This method also needs to be run periodically, making it tedious.

AdminDroid offers a suite of powerful reports that streamline the monitoring of forwarding rules in Microsoft 365, aiding admins in detecting and addressing unauthorized forwarding.

  • The Mailbox with Forwarding Inbox Rules report provided by AdminDroid makes it easy to identify email forwarding rules in user mailboxes.
  • This in-depth report provides valuable insights into which mailboxes have forwarding enabled with other key details, aiding in tracking misconfigured rules.
mailbox-with-internal-and-external-frwd-rules-faq2

How to create an alert for external forwarding rules in Microsoft 365?

How to create an alert for external forwarding rules in Microsoft 365? +

Suspicious inbox forwarding rules pose significant security risks, as attackers often use them in Business Email Compromise (BEC) attacks. By setting up forwarding rules, attackers can automatically send copies of incoming emails to external addresses, allowing them to intercept sensitive information without detection. This makes it crucial to create alerts for the creation of forwarding rules in Microsoft 365 to promptly identify and mitigate these threats.

Here are the steps to create an alert for forwarding rules in Microsoft 365 Defender:

  • Go to the Alert policies page in Microsoft 365 Defender.
  • Click +New Alert Policy, then name your policy and add a suitable description.
  • Set the severity to High and the category to Mail flow. Click Next.
  • Select the Created mail forward/redirect rule under the 'Activity is' dropdown.
  • Choose Every time an activity matches the rule for how the alert should be triggered. Click Next.
  • Email notifications are selected by default. Select alert recipients.
  • Set the Daily notification limit and click Next.
  • Review your settings, choose Yes, turn it on right away, and click Submit.
  • Click Done.

alert-policy-page-in-ms-defender

By following these steps, you can effectively create alerts for forwarding rules in Microsoft 365, enhancing your organization's ability to detect and respond to potential security threats promptly. However, these alerts are general and do not specify whether the forwarding rules are set to external or internal addresses. Determining this requires a thorough investigation of each rule, which can be tedious.

Monitoring external forwarding rules is a breeze with AdminDroid's dedicated reports!

To effectively keep track of external forwarding rules, AdminDroid provides a report on Inbox Rule Configuration Changes with External Forwarding under Exchange Analytics. These reports offer detailed insights like event time, user who created, rule name, forwarding addresses, etc.

External forwarding alerts made easy with AdminDroid!

You can set up alert polices to notify you when an external forwarding inbox rule is created, in just a few clicks.

  • Apply filter for 'New-InboxRule' operation in the specified report.
  • Hit the bell-icon in the report interface.
  • Click 'Create Alert Policy' button to set up policy.

external-forwarding-rule-creation

How to identify the user-removed inbox rules in Microsoft 365?

How to identify the user-removed inbox rules in Microsoft 365? +

Tracking inbox rules removed by users in Microsoft 365 is crucial for various reasons:

  • Detecting if malicious rules were removed to cover tracks after an attack.
  • Ensuring compliance with organizational policies regarding email management.
  • Identifying if rule removals are causing issues with email flow or user experience.
  • Auditing user actions for accountability and identifying training needs.

In Microsoft 365, traditional methods for monitoring user-removed inbox rules have been deprecated. This has made it cumbersome for admins to track these changes, as there is currently no convenient built-in way to generate reports on removed inbox rules by users. The lack of straightforward tracking increases the risk of missing critical security and compliance issues.

Until Microsoft introduces a more convenient solution, AdminDroid offers a robust alternative.

  • AdminDroid's audit reports not only showcase the rules removed by users but also include all rule operations performed by users, such as enabling and disabling rules.
  • Navigate to Analytics»Exchange Analytics»Inbox Rule Audit in AdminDroid.
  • Go to the Other Operations to access the Enabled/Disabled/Removed Inbox Rule Changes report.
removed-inbox-rules-faq1

In addition, AdminDroid provides granular details of every inbox rule and configuration in easily digestible charts and graphs. This comprehensive approach ensures admins have full visibility into inbox rule changes, enhancing security, compliance, and user accountability.

inbox-rules-chart-faq1

How to prevent users from creating potentially harmful inbox rules in Microsoft 365?

How to prevent users from creating potentially harmful inbox rules in Microsoft 365? +

Have you heard of Outlook rules attacks? These attacks involve cybercriminals exploiting the rules feature to automate malicious actions such as deleting or exfiltrating sensitive emails. This can happen without the user's knowledge, making the attack hard to detect and allowing continued unauthorized access.

Given these risks, it's crucial to prevent compromised or suspicious users from creating harmful rules. While inbox rule creations can be disabled for all Outlook Web App users via the global setting OWAMailboxPolicy-Default, this might not be a viable option. So, let's walk through how to disable inbox rule options for a particular user in Microsoft 365:

  • Login to the Exchange Admin Center.
  • Click on "Roles" and then select "Outlook web app policies".
  • Click on New OWA policy to create a new policy.
  • Name your policy and click Next.
  • Under the "Features" section, click on Information Management.
  • Uncheck "Inbox Rules" and configure the rest of the policy settings as per your requirements.
  • Click Create to confirm the new settings.

Now apply this policy to the suspicious user using PowerShell:

  • Open PowerShell and connect to your Exchange Online environment.
  • Run the following command to apply the policy to a specific user.
Set-CASMailbox -Identity "<UPN>" -OWAMailboxPolicy "<PolicyName>" 

Once inbox rules are disabled for a user, they will no longer be able to create, manage, or access any rules. Additionally, any rules that were already created will also be inaccessible and cannot be modified by the user.

+

Kickstart Your Journey With
AdminDroid

Your Microsoft 365 Companion with Enormous Reporting Capabilities

Download Now
User Help Manuals Compliance Docs
x
Delivering Reports on Time
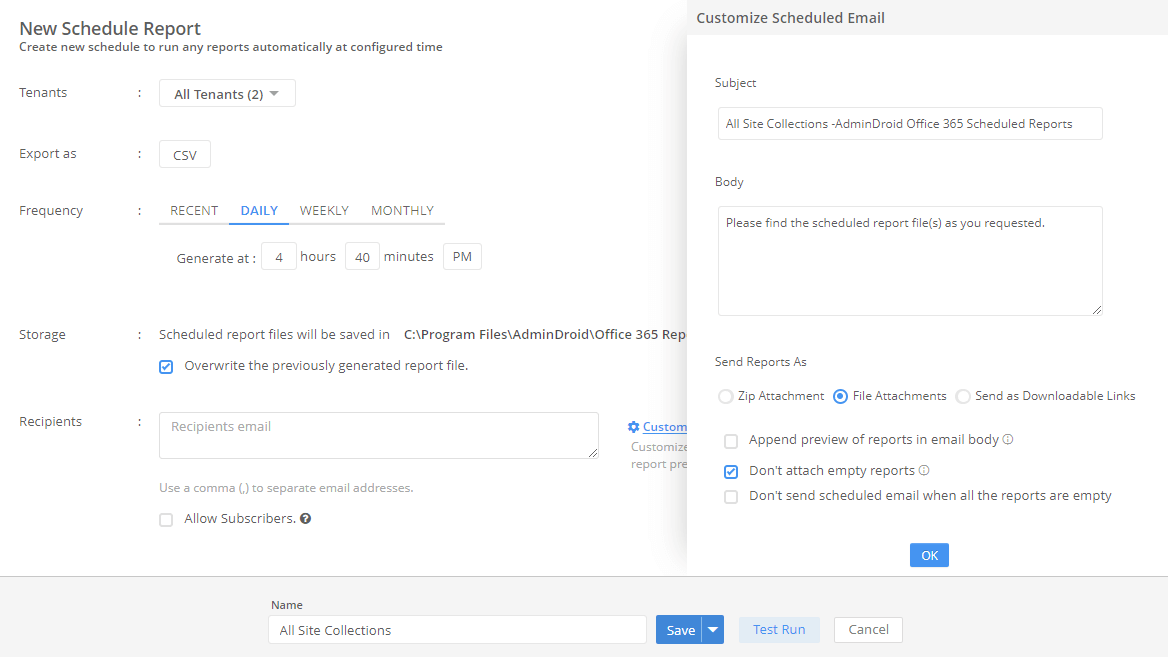
Want a desired Microsoft 365 reports every Monday morning? Ensure automated report distribution and timely delivery with AdminDroid's Scheduling to your email anytime you need.
Delivering Reports on Time
Schedule tailored reports to execute automatically at the time you set and deliver straight to the emails you choose. In addition, you can customize report columns and add inteligent filtering to the activities just from the previous day to suit your Microsoft 365 report requirements.
Set It, Schedule It, See Results- Your Reports, Your Way, On Your Time!
Time Saving
Automation
Customization
Intelligent Filtering
Give Just the Right Access to the Right People
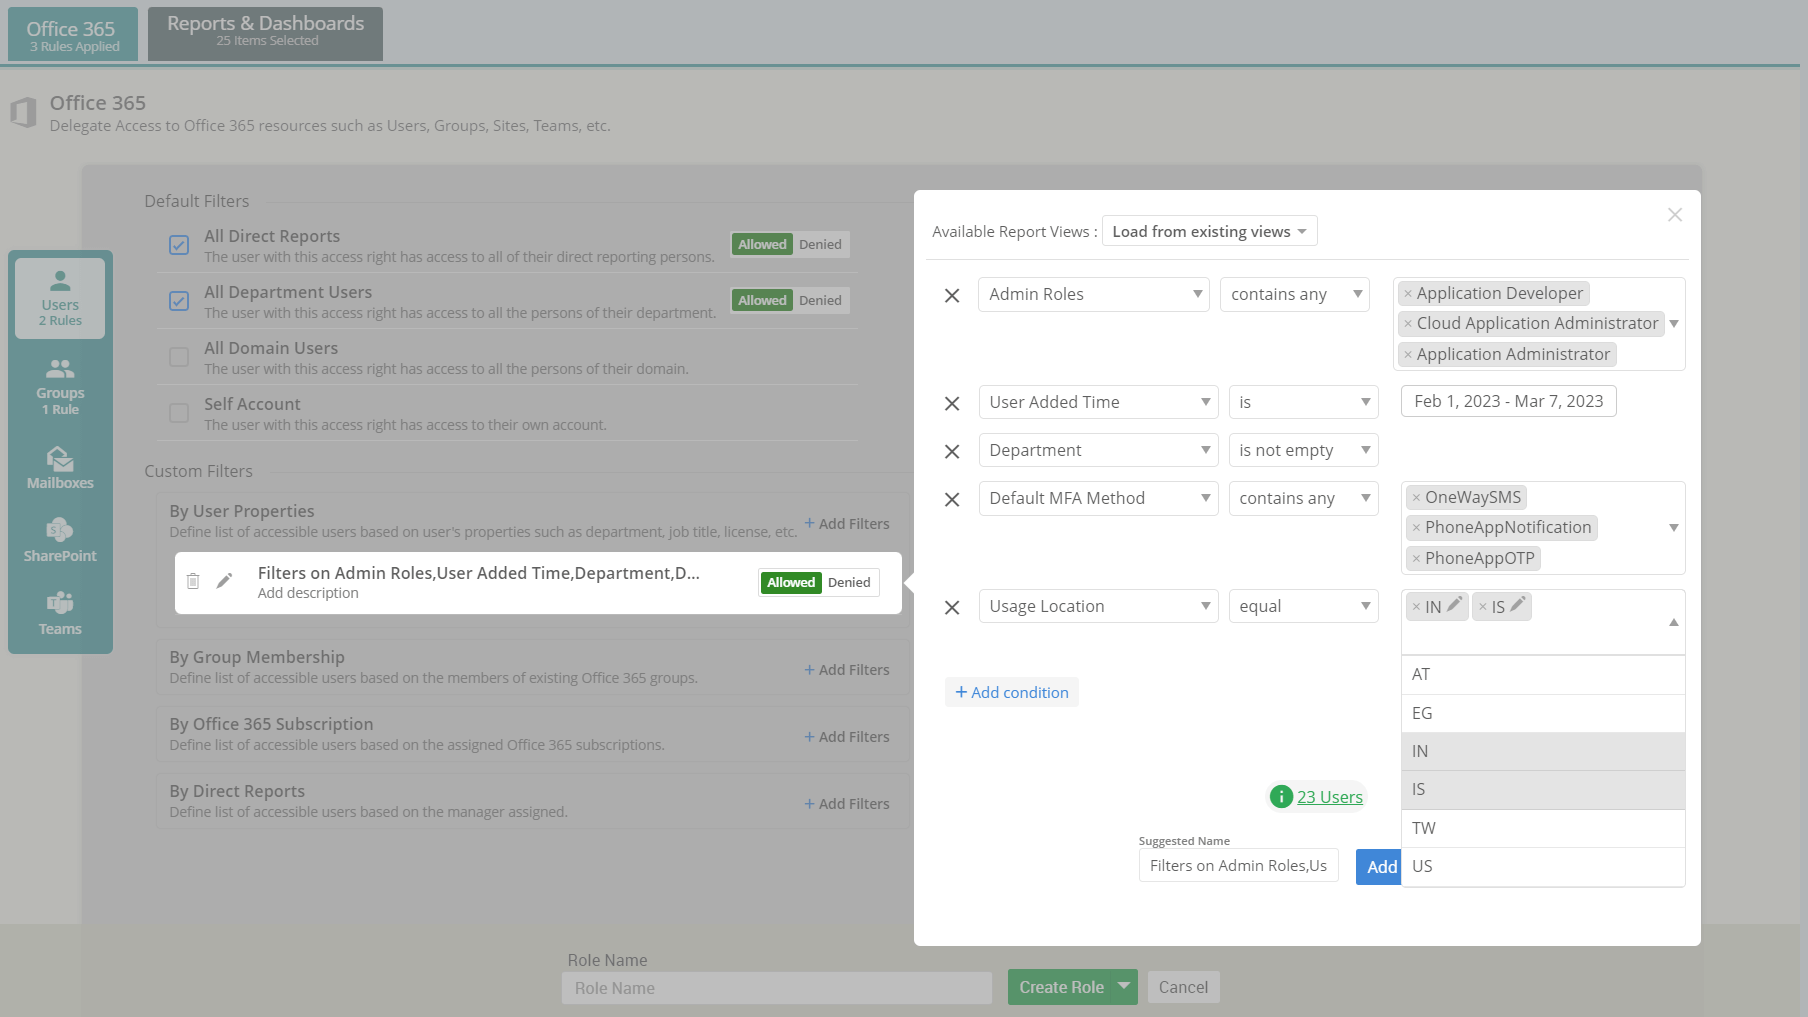
Grant fine-tuned access to any Microsoft 365 user with AdminDroid’s Granular Delegation and meet your organization’s security and compliance requirements.
Give Just the Right Access to the Right People
Create custom roles loaded with just the right permissions and give access to admins or normal users within AdminDroid. The result? A streamlined Microsoft 365 management experience that aligns your organization's security protocols and saves your invaluable time and effort.
Align, Define, Simplify: AdminDroid's Granular Delegation
Smart Organizational Control
Effortless M365 Management
Simplified Access
Advanced Alerts at a Glance
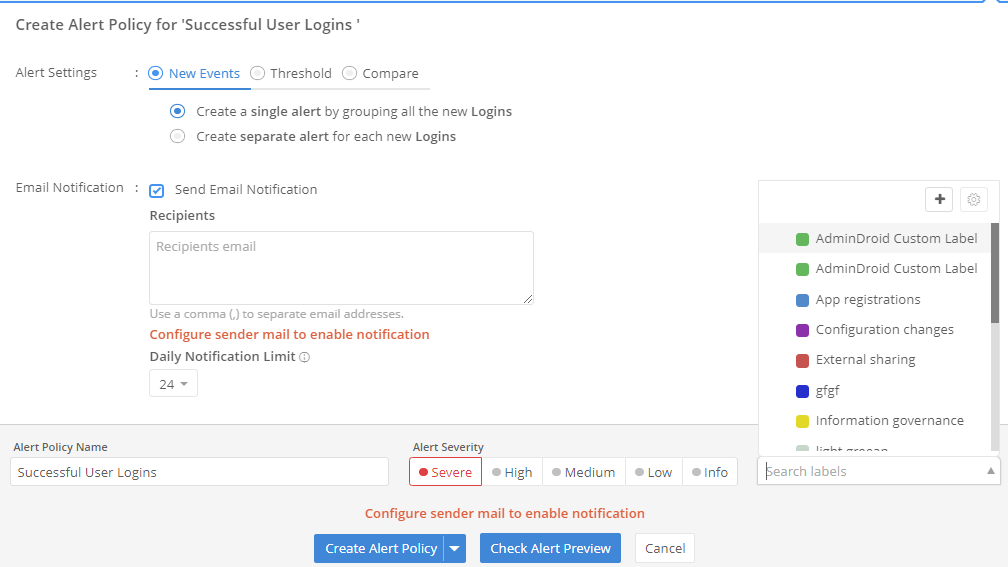
Receive quick notifications for malicious Microsoft 365 activities. Engage with the AdminDroid’s real-time alert policies crafted to streamline your security investigations.
Advanced Alerts at a Glance
Stay informed of critical activities like suspicious emails and high-risk logins, bulk file sharing, etc. Through creating and validating ideal alert policies, AdminDroid provides a comprehensive approach to real-time monitoring and management of potential threats within your organization.
AdminDroid Keeps You Always Vigilant, Never Vulnerable!
Proactive Protection
Real-time Monitoring
Security Intelligence
Threat Detection
Merge the Required Data to One Place
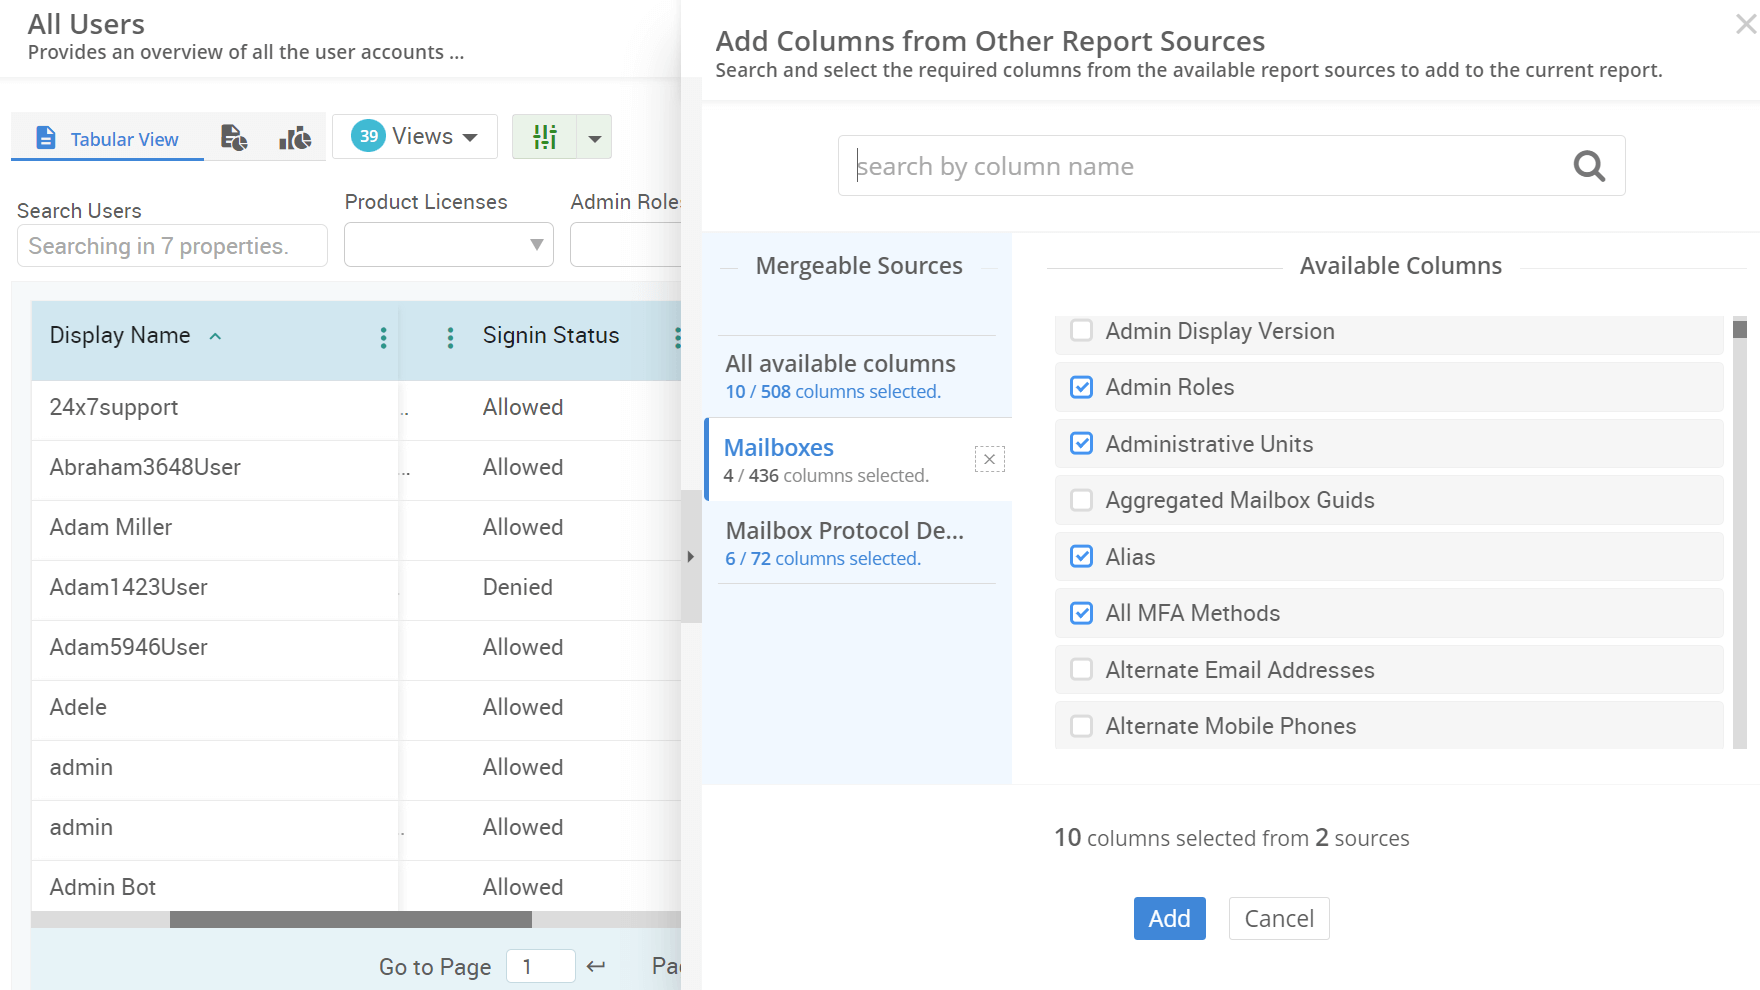
Combine multiple required columns into one comprehensive report and prioritize the information that matters most to you with AdminDroid’s Advanced Column Customization.
Merge the Required Data to One Place
This column merging capability offers a flexible way to add different columns from various reports and collate all the essential data in one place. Want to revisit the customized report? Save it as a 'View’, and your unique report is ready whenever you need it.
Merge with Ease and Save as Views!
Custom Reporting
Unique View
Desired Columns
Easy Data Interpretation
Insightful Charts and Exclusive Dashboards
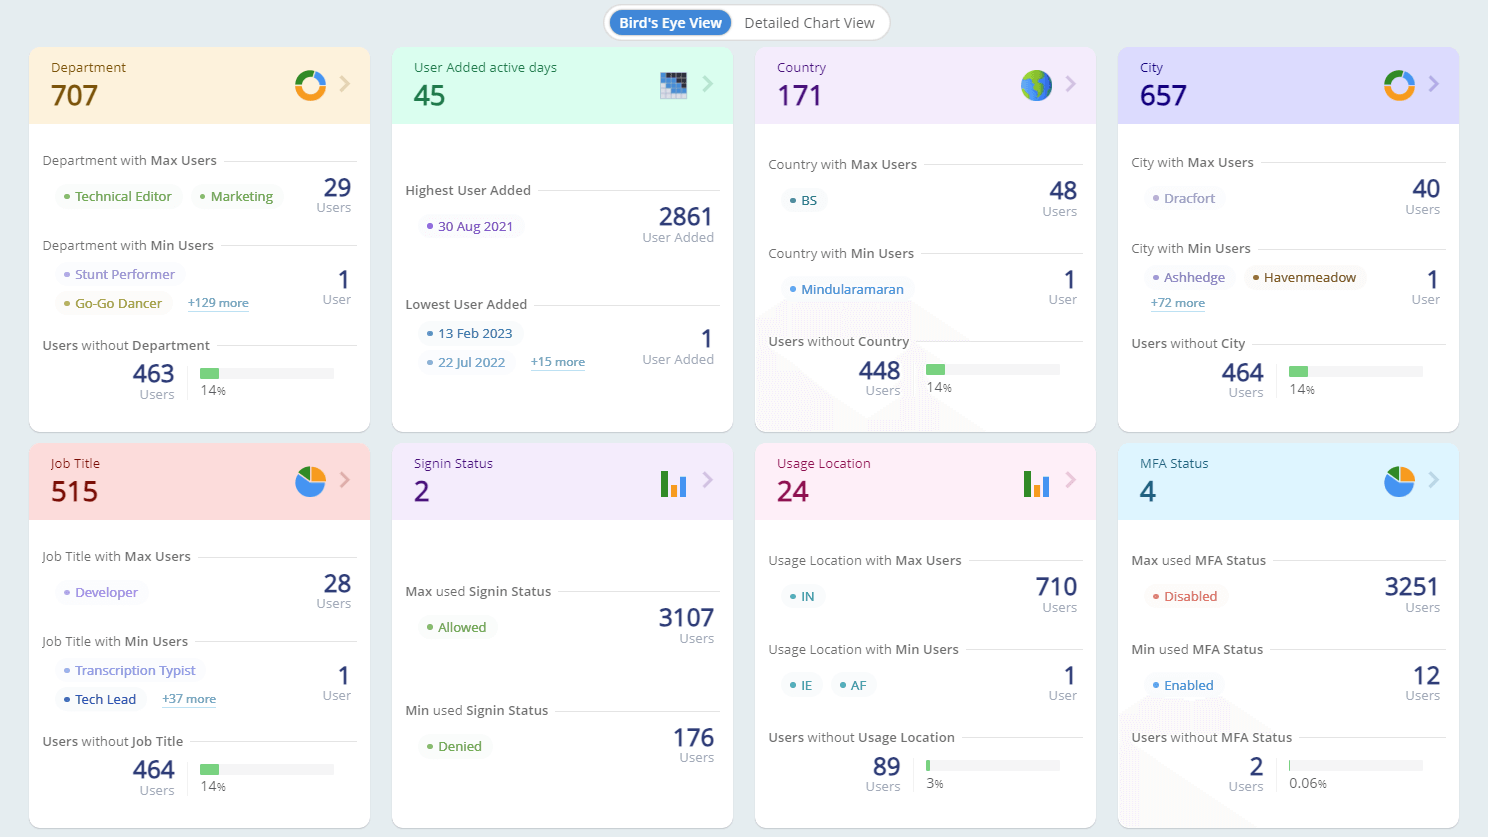
Get a quick and easy overview of your tenant's activity, identify potential problems, and take action to protect your data with AdminDroid’s Charts and Dashboards.
Insightful Charts and Exclusive Dashboards
With AdminDroid charts and dashboards, visualize your Microsoft 365 tenant in ways you've never thought possible. It's not just about viewing; it's about understanding, controlling, and transforming your Microsoft 365 environment.
Explore Your Microsoft 365 Tenant in a Whole New Way!
Executive overviews
Interactive insights
Decision-making
Data Visualization
Efficient Report Exporting for Microsoft 365
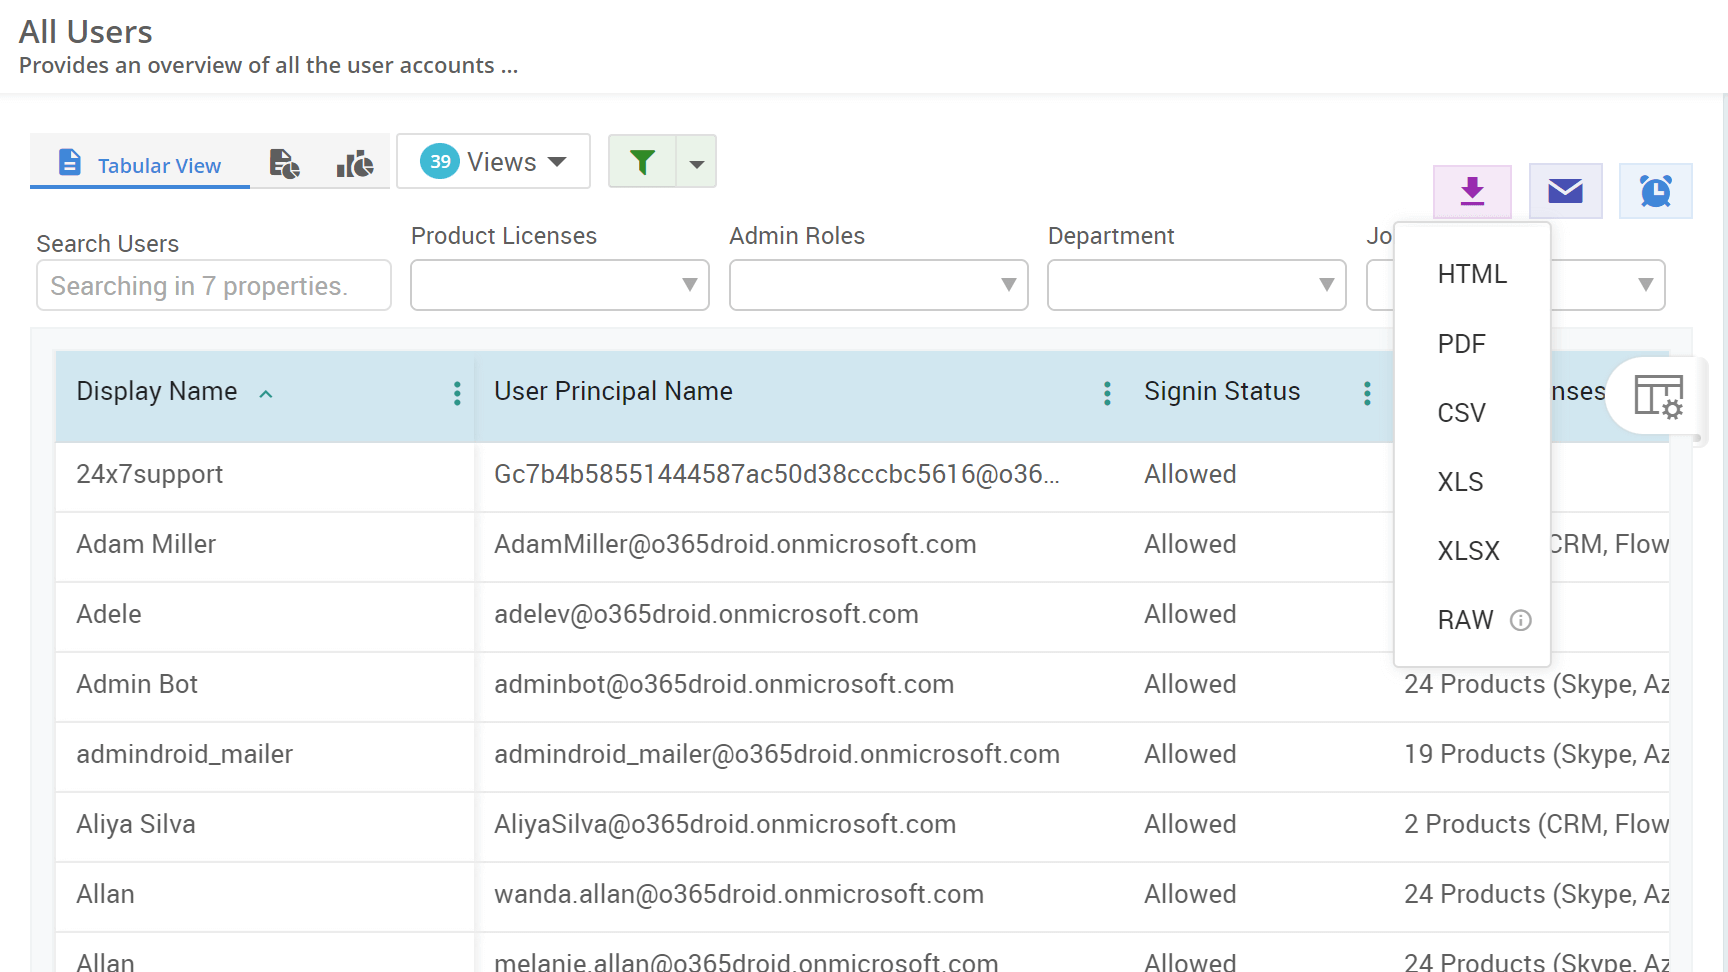
Downloading your reports in the right file format shouldn’t be a hassle with AdminDroid’s Report Export. Experience seamless report exporting in various formats that cater to your needs.
Efficient Report Exporting for Microsoft 365
Navigate through diverse options and export Microsoft 365 reports flawlessly in your desired file format. Tailor your reports precisely as you need them and save them directly to your computer.
Take Control, Customize and Deliver- Your Office 365 Data, Exported in Your Way!
Easy Export
Seamless Downloading
Data Control
Manage Microsoft 365

Get AdminDroid Office 365 Reporter Now!