🎉 Our Office 365 Reporting Tool is now available in Azure Marketplace 🚀
This website uses cookies to improve your experience. We'll assume you're ok with this. Know more.
SharePoint Online

How to Audit SharePoint Online Folder Activity

Imagine your team is working on a project that relies on a shared SharePoint Online folder to store critical files. With multiple departments collaborating on this folder, it’s essential to track who accesses, modifies, or moves files to ensure control. This guide will show you how to monitor folder activity in SharePoint Online, providing essential insights to manage them effectively.

Using Microsoft 365 Purview Portal

Microsoft 365 Permission Required
View-Only Audit Logs Role Least Privilege
Global Admin Most Privilege
  • Log in to the Microsoft 365 Purview portal and navigate to the Audit section.
  • Customize the start and end date as per your requirement.
  • In the Workload section, select SharePoint and enter the following operations in the Activities-operation names field.

    FolderCreated, FolderModified, FolderRenamed, FolderCopied, FolderMoved, FolderDeleted, FolderRecycled, FolderDeletedFirstStageRecycleBin, FolderDeletedSecondStageRecycleBin, FolderRestored

  • Hit the Search button and wait for the search to be completed.
  • Once the search is complete, you can view the folder activity audit results.
  • Use the Export option in the results to download the SharePoint Online folder activity report for offline access.
Using Microsoft 365 Purview Portal
  • Note: Change the Workload to OneDrive to audit folder activities in OneDrive for Business.

Using PowerShell Script

Microsoft 365 Permission Required
View-Only Audit Logs Role Least Privilege
Global Admin Most Privilege
  • The PowerShell cmdlet Search-UnifiedAuditLog from the Exchange module can audit folder activities but lacks the ability to present results in a user-friendly format.
  • To address this gap, we’ve developed a PowerShell script that audits folder activities and generates detailed reports with comprehensive insights.
  • The script supports generating separate reports for SharePoint Online and OneDrive folder activities.
  • To generate a SharePoint folder activity report, run the script with the SharePointOnline parameter as shown below.

    ./AuditSPOFolderActivities.ps1 -SharePointOnline
Using PowerShell Script
AuditSPOFolderActivities.ps1

Effortlessly audit SharePoint Online folder access with advanced reports!

Gain full control over your SharePoint environment with AdminDroid’s SharePoint Online auditing tool. It provides detailed reports on folder activities, user actions, and permission changes. Real-time insights into file and folder creation, sharing, and access allow for the swift detection of unauthorized activities, ensuring your data remains secure.

Optimize Cross-Site Folder Management

Audit folders copied across sites in SPO to prevent duplication and enhance document organization, ensuring efficient storage management.

Streamline Site-to-Site Content Migration

Assess folders moved across SPO sites to ensure smooth migrations while maintaining access controls and verifying the success of large-scale reorganization.

Keep an Eye on Folders Deleted via Scripts

Monitor deletions made by delegated scripts and quickly investigate any suspicious permanent folder deletions using the script-based folder deletions report.

Stay in Control of Shared Folder Activities

Easily filter and view shared folder details with the SPO shared items report, allowing you to track folder activities while enhancing security and control.

Effortlessly Monitor SharePoint Online File Usage

Analyze document interactions and user behavior through SharePoint Online file usage tracking to improve content management and gain insights into file usage trends.

Gain Full Visibility into SharePoint User Actions

Utilize the SPO management activities report to get complete insights into user management activities in SharePoint Online to immediately detect suspicious behaviours.

Overall, the AdminDroid’s SharePoint Online management tool helps you monitor user activities, track sharing patterns, and manage permissions. It enables organizations to maintain security, protect sensitive data, and optimize storage effectively.

Explore a full range of reporting options

Important Tips

Use folder-level permissions instead of item-level to simplify access control management and reduce the risk of permission misconfigurations.

Set the default sharing link for files and folders as 'Only people in your organization' to prevent anonymous sharing and data exposure.

Categorize SPO folders by color to highlight priorities or projects, making it easier for teams to locate critical files and stay focused during collaborative tasks.

Common Errors and Resolution Steps

The following are the possible errors and troubleshooting hints when auditing or managing folder activities in SharePoint Online.

Error The specified file or folder name is too long. The URL path for all files and folders must be 400 characters or less (and no more than 400 characters for any single file or folder name in the URL). Please type a shorter file or folder name.

This error occurs when the server-relative URL or folder name exceeds the 400-character limit imposed by SharePoint Online.

Fix To resolve this error, use short names for folders or files and limit the number of nested folders to reduce the total path length.

Error Connect-PnPOnline: Specified method is not supported.

This error occurs when you try to connect to PnP PowerShell without a client ID.

Fix PnP PowerShell no longer uses the PnP Management Shell multi-tenant application for interactive authentication. To connect PnP PowerShell, register your own application with SPO permission in Entra and use its application ID in the -ClientId parameter.
Connect-PnPOnline -Url "<SiteUrl>" -ClientId "<ClientID>" –Interactive

Error Your organization's policies don't allow you to share with these users. Go to External Sharing in the Office 365 admin center to enable it.

This error occurs when you try to share a folder externally using unique permission, but external sharing is not enabled in your tenant.

Fix To share a folder externally, the tenant must have the 'Anyone' sharing option enabled and the File and folder link set to 'Anyone with the link'. However, enabling 'Anyone' sharing in SharePoint Online is not recommended unless necessary.

Error Restore-PnPRecycleBinItem: Object reference not set to an instance of an object.

This error occurs when you try to restore the folder from the recycle bin using its name.

Fix To restore the specific folder, find the item’s ID. Use the cmdlet below to find the ID of the item you want to restore.
Get-PnPRecycleBinItem

Frequently Asked Questions

Streamline SharePoint Online Folder Management for Enhanced Efficiency!

How to manage folders in SharePoint Online?

How to manage folders in SharePoint Online? +

Effective folder management is crucial for keeping SharePoint Online document libraries and lists organized. This involves key tasks such as creating folders, moving them, and deleting unnecessary or empty folders.

Create a folder in SharePoint Online

  • Navigate to the desired SharePoint Online site’s document library or list.
  • Click New and select Folder from the drop-down menu.
  • Enter a name for the folder and click Create.
spo-folder-creation

Note: Folder creation in SharePoint Online lists is disabled by default. To enable it, go to Settings»List settings»Advanced settings, select Yes straight to the Folders section, and click OK.

You can also add a folder to a document library or list in SPO by running the following PnP PowerShell cmdlets.

# To connect to the desired SharePoint Online site 
Connect-PnPOnline -Url "<SiteUrl>" -ClientId "<ClientID>" –Interactive 

# To add a folder to a document library or list 
Add-PnPFolder -Name  "<FolderName>" -Folder "<FolderPath>"

Move a folder in SharePoint Online

  • Select the folders to move, then click the Move to option from the top.
  • Select a destination in the current library or another SharePoint site’s document library.
  • If the site isn’t listed, choose it using the More places option. Then click Move here to move the folders.
move-spo-folder

Alternatively, you can use the following PnP PowerShell cmdlets to move the folder within the same site or to a different SharePoint site.

# To move a folder to another document library or folder in the current site 
Move-PnPFolder –Folder "<LibraryName>/<FolderName>" -TargetFolder "<DestinationLibrary>/<DestinationFolder>" 

# To move a folder to a document library or folder in another site 
Move-PnPFile –SourceUrl "<LibraryName>/<FolderName>" -TargetUrl "/sites/<SiteName>/<DestinationLibrary>/<DestinationFolder>"

Delete a folder in SharePoint Online

  • Access the document library or list of the desired SharePoint Online site.
  • Select the folders and click Delete. You can also right-click or hit ellipses (...) in the folder to find the delete option.
  • Then hit the Delete button in the pop-up window.
delete-spo-folder

To delete a folder using PnP PowerShell, run the following cmdlets.

# To move a folder to the site recycle bin 
Remove-PnPFolder –Name "<FolderName>" -Folder "<LibraryName>/<ParentFolderName>" –Recycle 

# To permanently delete a folder from the SPO site 
Remove-PnPFolder –Name "<FolderName>" -Folder "<LibraryName>/<ParentFolderName>"

How to find and delete empty folders in SharePoint Online?

How to find and delete empty folders in SharePoint Online? +

Over time, SharePoint Online sites may accumulate empty folders that no longer serve a purpose. These folders can clutter your document libraries and hinder users from navigating and managing content effectively. Therefore, it is necessary to find empty folders in the SPO site to remove them for an organized structure.

Find and remove empty folders in a SharePoint site

  • Open the desired SharePoint document library and choose Add column, then click the Show or hide columns in the pop-up window.
  • Select Item Child Count and Folder Child Count in the Edit view columns pane, then click Apply to save the changes.
  • Now, the columns will display the total number of items and subfolders within each folder.

Note: To quickly identify empty folders in SharePoint, sort any of the child count columns in ascending order. Folders with a child count of zero will indicate that they are empty and can be safely removed or reorganized.

After finding the empty folders, select them, click Delete, and confirm the deletion when prompted.

find-empty-folders-spo
empty-folders-spo-site-library

Find and delete empty folders in SPO using PnP PowerShell Script

To delete empty folders in all document libraries in your SPO site, run the following script in PowerShell 7. Before running the script, replace <SiteUrl> and <ClientId>.

Connect-PnPOnline -URL "<SiteURL>" -ClientId "<ClientId>" -Interactive
Function Get-EmptyFolders([Microsoft.SharePoint.Client.Folder]$Folder){
$FolderSiteRelativeURL = $Folder.ServerRelativeUrl.Substring($Web.ServerRelativeUrl.Length+1)
$SubFolders = Get-PnPFolderItem -FolderSiteRelativeUrl $FolderSiteRelativeURL -ItemType Folder
Foreach($SubFolder in $SubFolders){
If(($SubFolder.Name -ne "Forms") -and (-Not($SubFolder.Name.StartsWith("_")))){
Get-EmptyFolders -Folder $SubFolder}}
$Files = Get-PnPFolderItem -FolderSiteRelativeUrl $FolderSiteRelativeURL -ItemType File
$SubFolders = Get-PnPFolderItem -FolderSiteRelativeUrl $FolderSiteRelativeURL -ItemType Folder
If ($Files.Count -eq 0 -and $SubFolders.Count -eq 0){
$ParentFolder = Get-PnPProperty -ClientObject $Folder -Property ParentFolder
$ParentFolderURL = $ParentFolder.ServerRelativeUrl.Substring($Web.ServerRelativeUrl.Length+1)
Remove-PnPFolder -Name $Folder.Name -Folder $ParentFolderURL -Force -Recycle
Write-Host -f Yellow ("Deleted Folder: $($Folder.Name) at $($Folder.ServerRelativeURL)")}}
$Web = Get-PnPWeb
Get-PnPList -Includes RootFolder|
Where-Object { $_.BaseType -eq "DocumentLibrary" -and -not $_.Hidden }|
ForEach-Object {Write-Progress -Activity "Processing $($_.Title)"
Get-EmptyFolders $_.RootFolder}
Write-Host "Empty folder cleanup process completed."

How to restore deleted folders in SharePoint Online?

How to restore deleted folders in SharePoint Online? +

When a folder is accidentally deleted in SharePoint Online, it can disrupt workflows and lead to potential data loss. Fortunately, deleted folders are first moved to the site’s recycle bin, and if deleted again, they are moved to the second-stage recycle bin. This provides a total of 93 days’ grace period to restore the lost content.

Follow these steps to quickly restore deleted folders in SharePoint Online.

Restore deleted folders in SharePoint Online

  • Navigate to the SharePoint site where the folders were deleted.
  • Click the Recycle Bin link in the quick launch menu or navigate to Settings»Site Contents»Recycle Bin.
  • Locate the deleted folders in the recycle bin. If the folders are not in the recycle bin, click the Second-stage recycle bin present at the bottom of the page.
  • Select the folders and click Restore to restore them.
spo-folder-restoration

Restore deleted folders in SPO using PnP PowerShell

  • Connect to the desired site using the 'Connect-PnPOnline' cmdlet where you want to restore the deleted folder.
  • To restore a deleted folder, first we need to identify its location in the recycle bin. You can use the following cmdlet to search for the folder in the first-stage recycle bin.
    Get-PnPRecycleBinItem -FirstStage -RowLimit 500000
  • If no results are returned, the folder may have been moved to the second-stage recycle bin. Change the -FirstStage parameter to -SecondStage and rerun the cmdlet to locate the folder.
  • Once you locate the folder, copy its ID. Then, execute the following cmdlet, replacing <ID> with the copied folder ID.
    Restore-PnPRecycleBinItem -Identity "<ID>"

How to manage folder permissions in SharePoint Online?

How to manage folder permissions in SharePoint Online? +

In SharePoint Online, poorly managed folder permissions can lead to unauthorized access, putting data security at risk. When team members switch to another project, their access to SharePoint folders should be adjusted to prevent potential data exposure. Properly managing folder access in SharePoint ensures that only the right users can view confidential data, keeping your organization secure.

How to view and change the folder access permission in SharePoint Online?

You can edit the folder access permission in SharePoint Online by following the steps below.

  • Navigate to the Settings»Site contents page from the desired SharePoint site.
  • Select the library or list where the folder is located, right-click on the folder, and choose Manage access.
  • Here, you can view all the users and groups who have access to this folder.
  • To modify access permission, click on the desired user or group name.
  • Select the Direct Access accordion and click the drop-down that displays the current permission level.
  • Now, you can change their permissions or restrict access to the folder by selecting the Remove direct access option. Click Apply to save the changes.
folder-manage-access
folder-edit-access

Note: You can share a folder with other additional users, groups, or tenant-wide using the Share option in the Manage Access window.

How to create unique permissions for a folder in SharePoint Online?

Folders and files in a SharePoint Online site inherit permissions from the parent folder, list, or library by default. However, you can set unique permissions to control access at the folder level without affecting other contents on the site.

To customize permissions for a SharePoint folder, follow the steps below.

  • Right-click the respective folder and select Manage access. Then click the ellipsis (...) and choose Advanced settings.
  • Select Stop Inheriting Permissions and then click OK to break the inheritance.
  • Choose Grant Permissions, enter the user’s name or UPN, and select the appropriate permission level under Show Options.
  • Finally, click Share to grant those users access to the SharePoint folder.
spo-folder-delete-inheritence
create-folder-unique-permission

What are the differences between SharePoint folders and document libraries?

What are the differences between SharePoint folders and document libraries? +

When you create a SharePoint Online site or a team in Microsoft Teams, a default document library is automatically created. Each standard channel in Teams corresponds to a folder in this library, enabling file storage and organization.

SharePoint Online document libraries VS folders

Folders provide a simple way to group files within a document library using a hierarchical structure, making it easy to organize content. However, as your setup grows, folders may face scalability limitations and lack advanced features compared to document libraries.

Here are the key differences between document libraries and folders in SharePoint Online.

SharePoint Online document libraries


  • Serve as advanced containers with comprehensive management capabilities.
  • Support customizable views, metadata, and content types.
  • Offer version control, retention policies, and alerts to track changes.
  • Integrated with automated processes and support independent workflows.

SharePoint Online folders


  • Act as a basic structure for organizing files in a hierarchical manner.
  • Limited to basic naming and permission settings, with few customization options.
  • Do not offer version control or governance features like retention policies.
  • Workflow has been retired for folders and doesn’t support integration with other applications.

Elevate document library management with AdminDroid’s advanced reports!

Gain a clear understanding of hidden, empty, inactive document libraries, and more using AdminDroid’s SharePoint Online document library reports.

What are all the limitations and best practices for folders in SharePoint Online?

What are all the limitations and best practices for folders in SharePoint Online? +

Folders in SharePoint Online help organize files, but they can lead to challenges such as complex permission management and performance issues. To overcome these challenges, it’s essential to implement effective practices.

Here are the common limitations and best practices to optimize folder usage in SharePoint Online.

Limitations of using folders in SharePoint Online

  • Scalability: Folders with over 100,000 items can cause performance issues, especially when syncing large libraries via OneDrive. Breaking permission inheritance is also restricted at this scale.
  • View and metadata: Folders lack support for tagging and metadata columns, limiting efficient content categorization and the ability to filter & view information effectively compared to document libraries.
  • Permissions: Managing unique permissions for numerous folders can slow down performance and complicate future permission updates.
  • Folder structure: Excessive folder nesting in SharePoint can result in long URLs. The total URL path length can’t exceed 400 characters, and file names are limited to 260 characters. Although you can nest folders up to 250 levels, using too many levels can degrade performance.

Best practices for using folders in SharePoint Online

  • Use metadata instead of folders: Rather than relying on nested folders, it's recommended to use metadata for organizing and filtering files. Group files using metadata and columns to enhance content findability. This approach provides greater flexibility as content grows.
  • Limit folder depth: If folders are necessary, limit the folder depth to 3-4 levels for better performance and easier navigation for users. Use clear, descriptive names for folders and avoid special characters to prevent issues with URLs or syncing.
  • Create a new document library: For better organization, create separate document libraries for different departments or projects instead of fitting everything into one library with many folders. This allows you to customize views, sorting, and filtering capabilities in each library.
  • Define permissions at the library level: Apply permissions at the library level instead of individual folders whenever possible. Use groups for easier permission management and consider using sensitivity labels to control file access within libraries.
+

Kickstart Your Journey With
AdminDroid

Your Microsoft 365 Companion with Enormous Reporting Capabilities

Download Now
User Help Manuals Compliance Docs
x
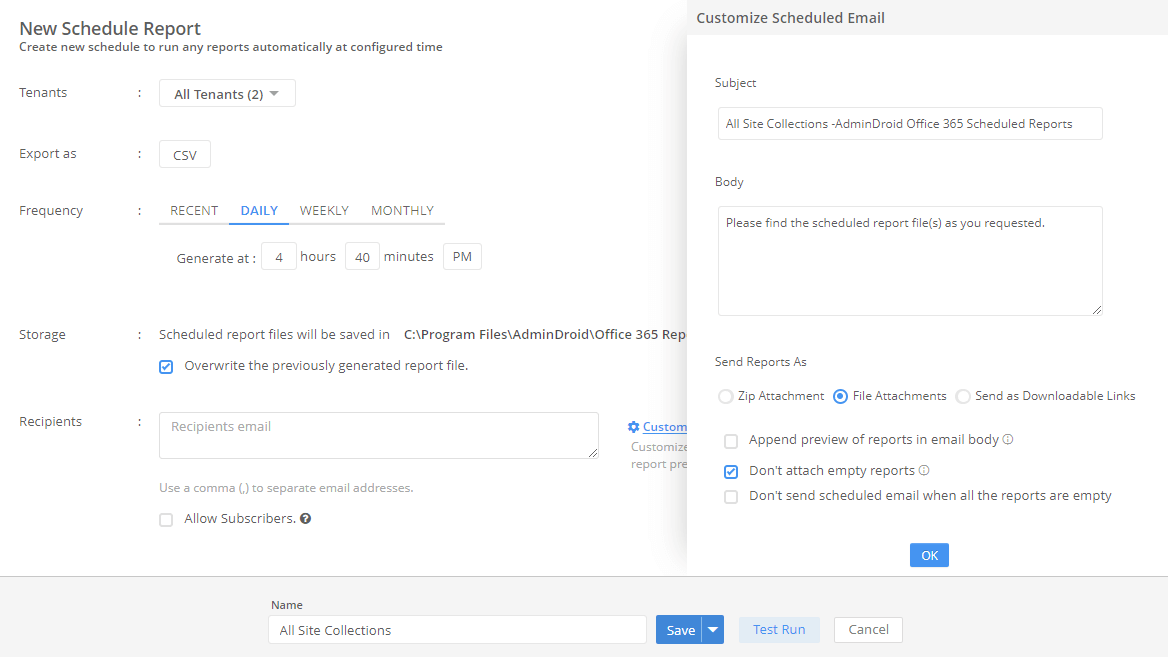
Delivering Reports on Time
Want a desired Microsoft 365 reports every Monday morning? Ensure automated report distribution and timely delivery with AdminDroid's Scheduling to your email anytime you need.
Delivering Reports on Time
Schedule tailored reports to execute automatically at the time you set and deliver straight to the emails you choose. In addition, you can customize report columns and add inteligent filtering to the activities just from the previous day to suit your Microsoft 365 report requirements.
Set It, Schedule It, See Results- Your Reports, Your Way, On Your Time!
Time Saving
Automation
Customization
Intelligent Filtering
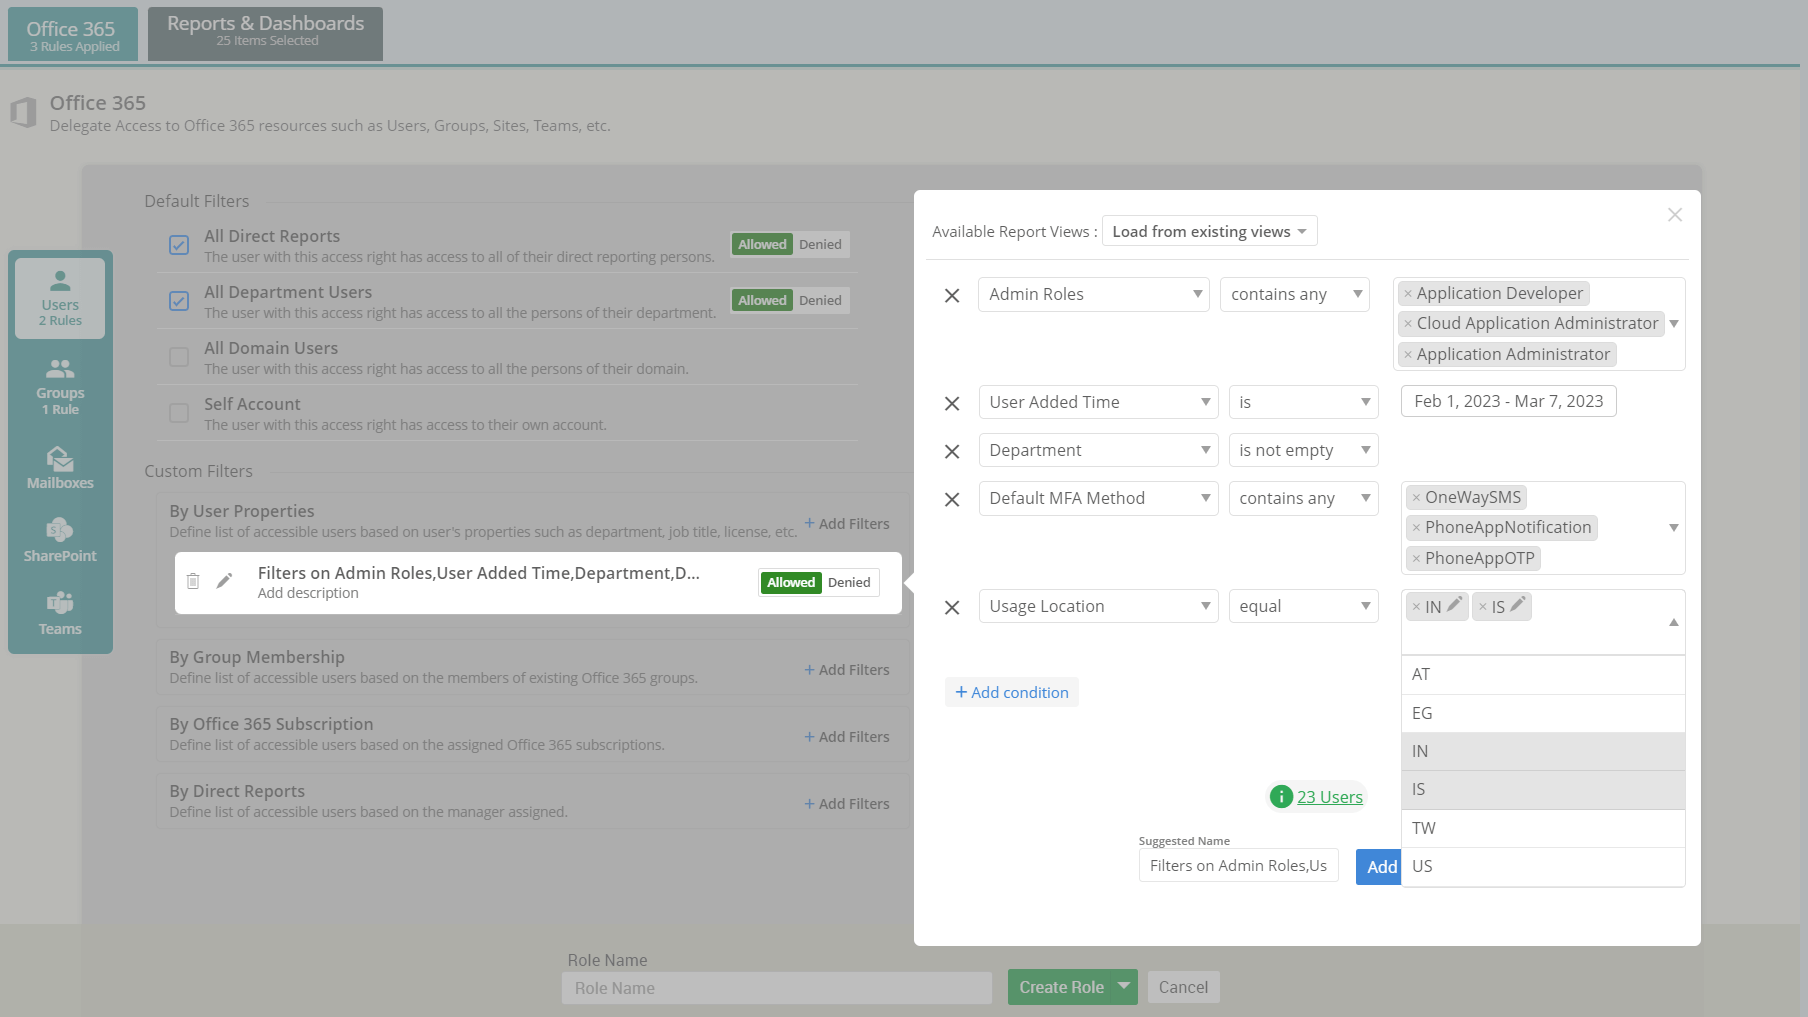
Give Just the Right Access to the Right People
Grant fine-tuned access to any Microsoft 365 user with AdminDroid’s Granular Delegation and meet your organization’s security and compliance requirements.
Give Just the Right Access to the Right People
Create custom roles loaded with just the right permissions and give access to admins or normal users within AdminDroid. The result? A streamlined Microsoft 365 management experience that aligns your organization's security protocols and saves your invaluable time and effort.
Align, Define, Simplify: AdminDroid's Granular Delegation
Smart Organizational Control
Effortless M365 Management
Simplified Access
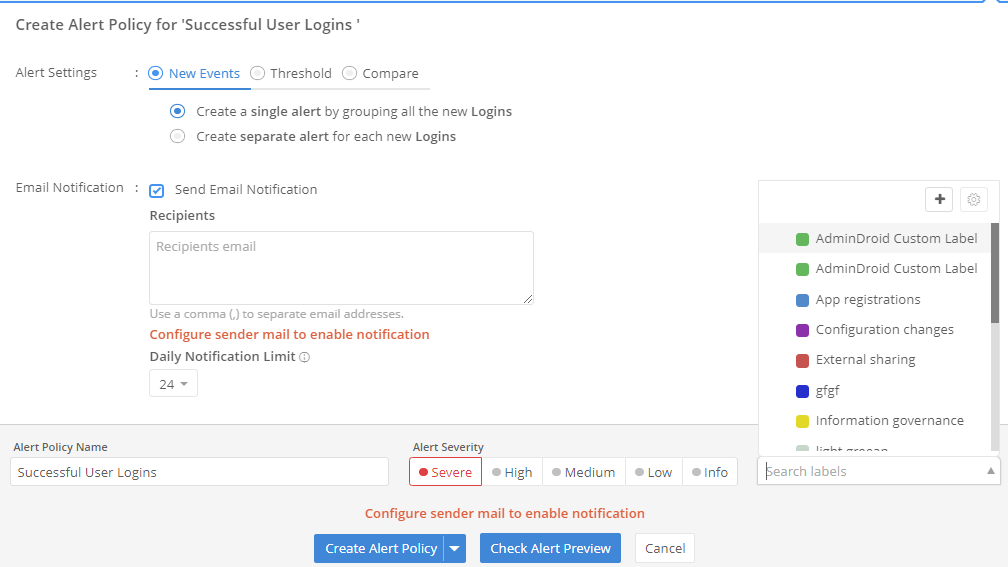
Advanced Alerts at a Glance
Receive quick notifications for malicious Microsoft 365 activities. Engage with the AdminDroid’s real-time alert policies crafted to streamline your security investigations.
Advanced Alerts at a Glance
Stay informed of critical activities like suspicious emails and high-risk logins, bulk file sharing, etc. Through creating and validating ideal alert policies, AdminDroid provides a comprehensive approach to real-time monitoring and management of potential threats within your organization.
AdminDroid Keeps You Always Vigilant, Never Vulnerable!
Proactive Protection
Real-time Monitoring
Security Intelligence
Threat Detection
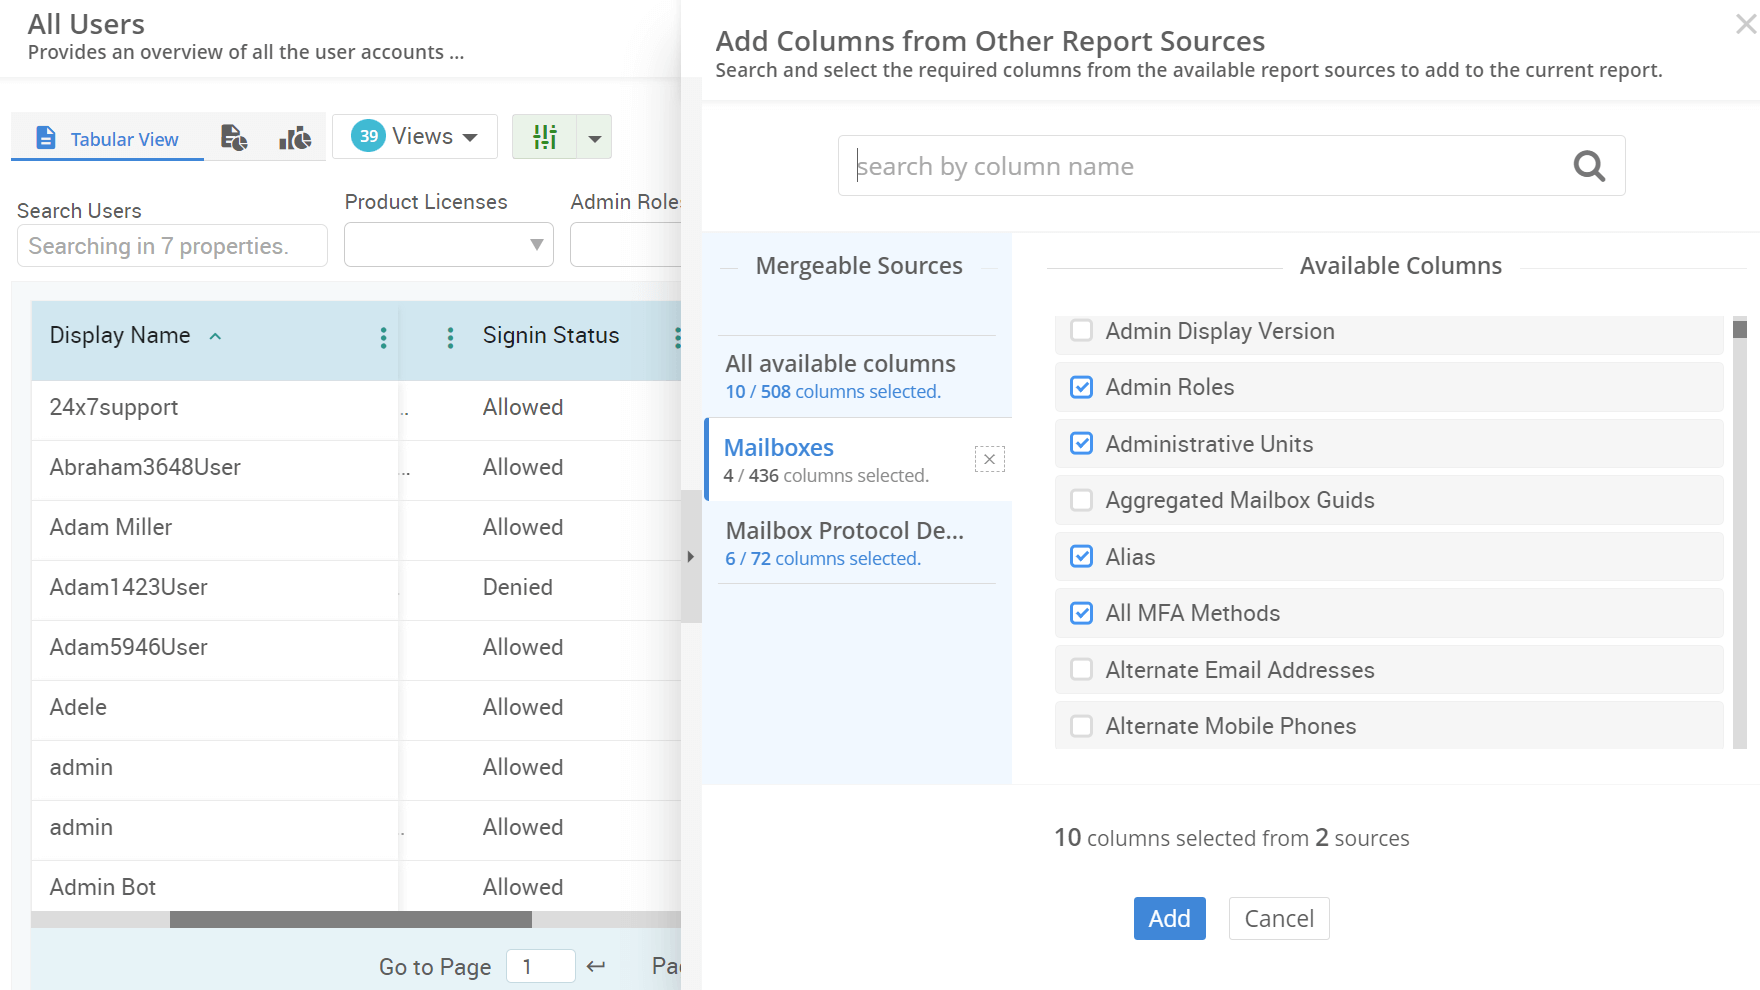
Merge the Required Data to One Place
Combine multiple required columns into one comprehensive report and prioritize the information that matters most to you with AdminDroid’s Advanced Column Customization.
Merge the Required Data to One Place
This column merging capability offers a flexible way to add different columns from various reports and collate all the essential data in one place. Want to revisit the customized report? Save it as a 'View’, and your unique report is ready whenever you need it.
Merge with Ease and Save as Views!
Custom Reporting
Unique View
Desired Columns
Easy Data Interpretation
Insightful Charts and Exclusive Dashboards
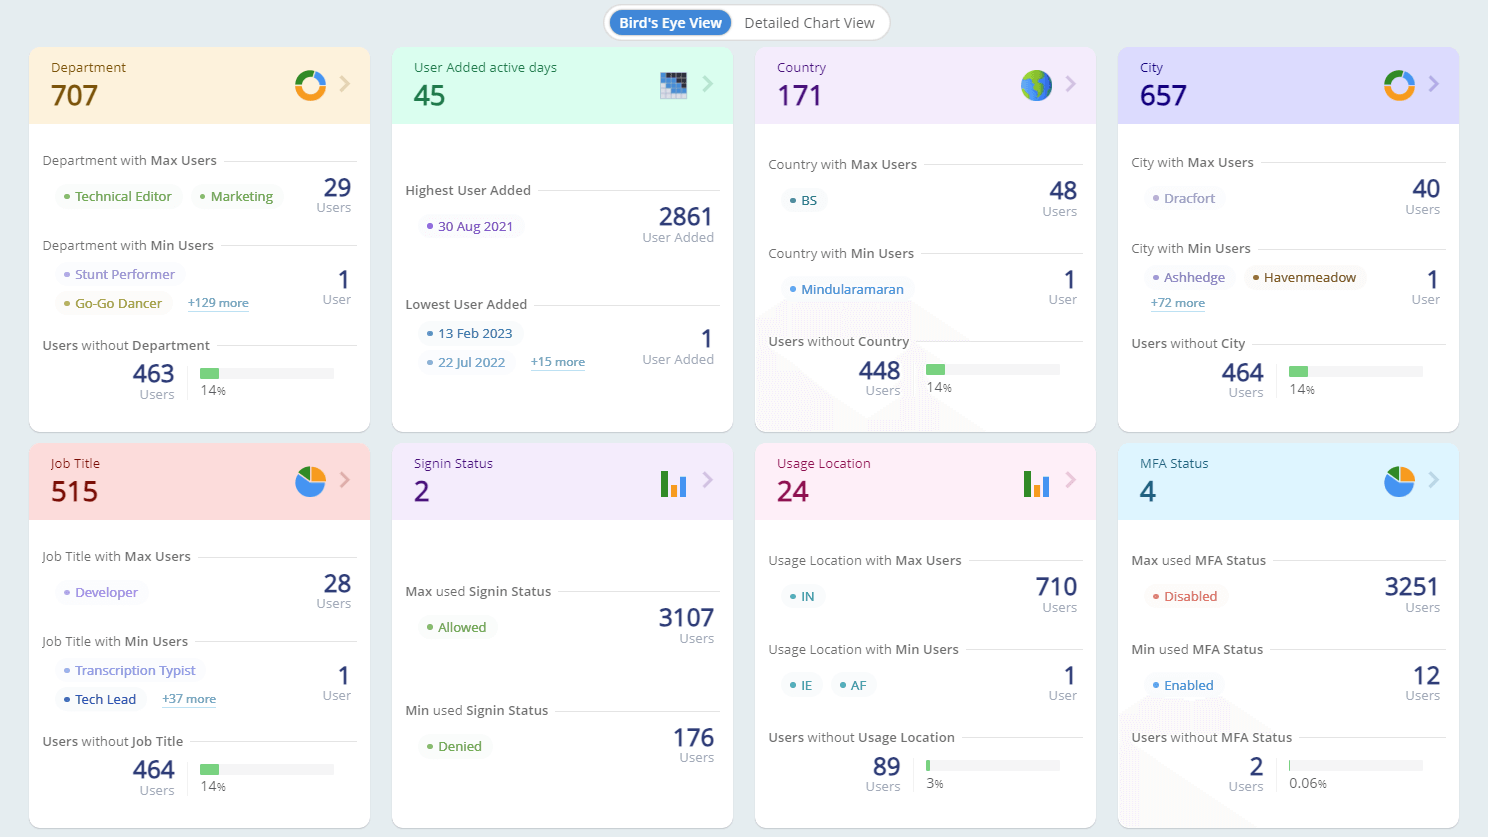
Get a quick and easy overview of your tenant's activity, identify potential problems, and take action to protect your data with AdminDroid’s Charts and Dashboards.
Insightful Charts and Exclusive Dashboards
With AdminDroid charts and dashboards, visualize your Microsoft 365 tenant in ways you've never thought possible. It's not just about viewing; it's about understanding, controlling, and transforming your Microsoft 365 environment.
Explore Your Microsoft 365 Tenant in a Whole New Way!
Executive overviews
Interactive insights
Decision-making
Data Visualization
Efficient Report Exporting for Microsoft 365
Downloading your reports in the right file format shouldn’t be a hassle with AdminDroid’s Report Export. Experience seamless report exporting in various formats that cater to your needs.
Efficient Report Exporting for Microsoft 365
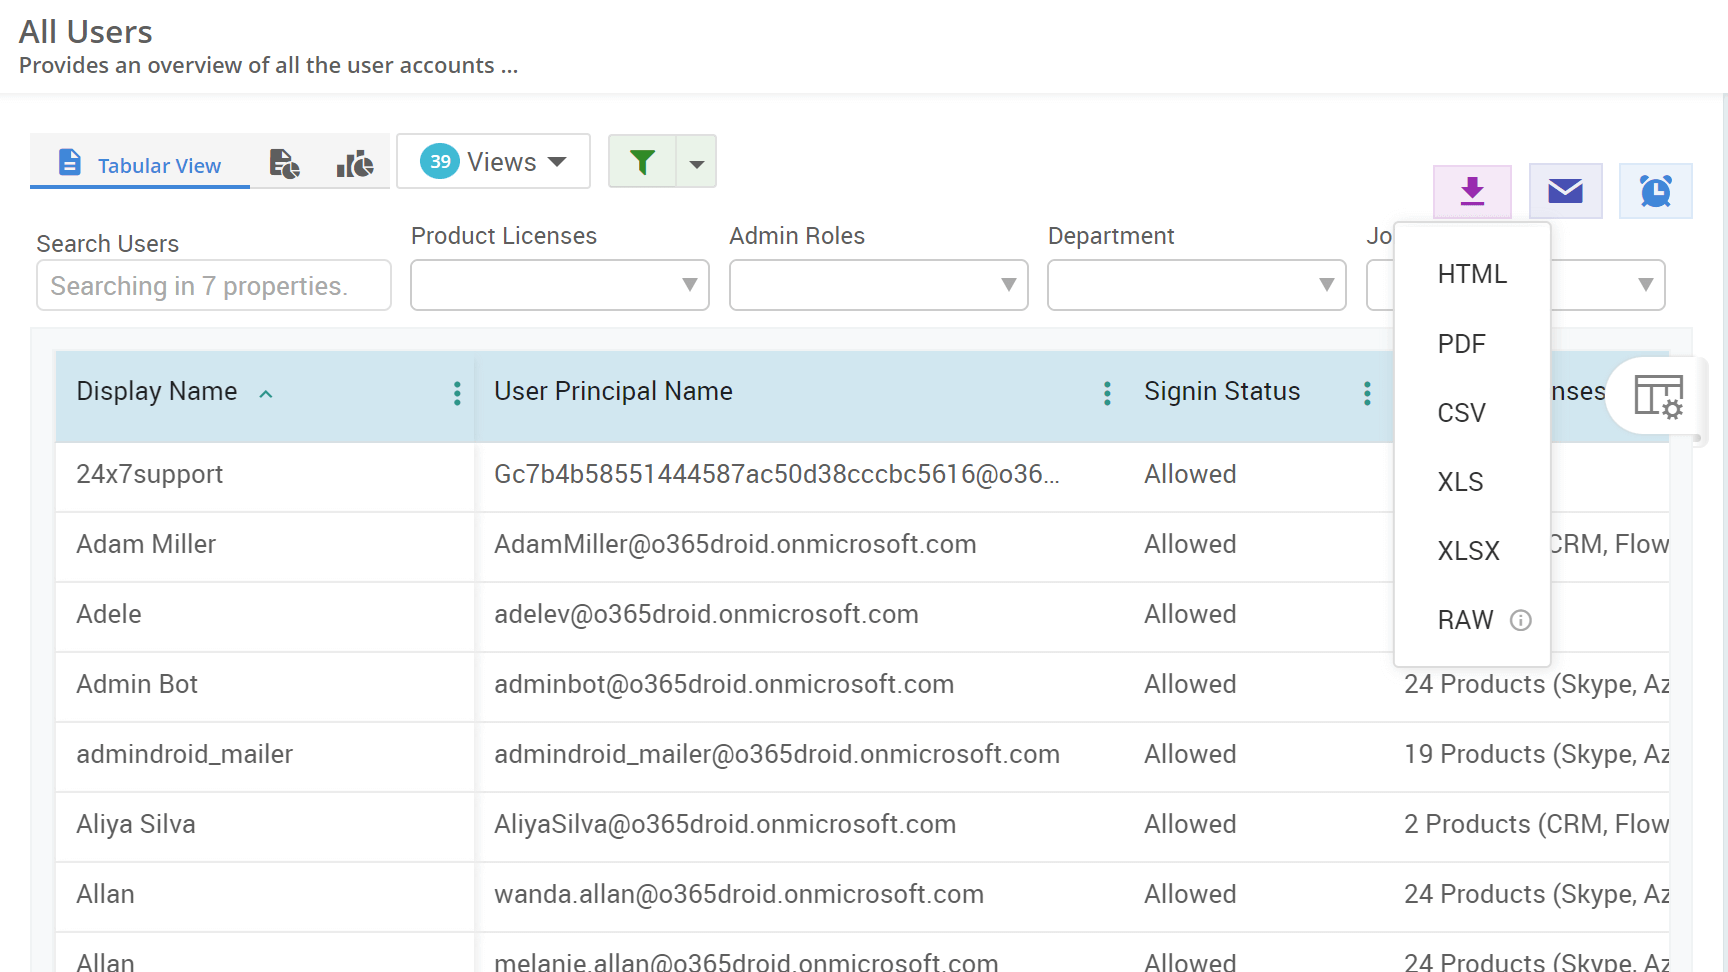
Navigate through diverse options and export Microsoft 365 reports flawlessly in your desired file format. Tailor your reports precisely as you need them and save them directly to your computer.
Take Control, Customize and Deliver- Your Office 365 Data, Exported in Your Way!
Easy Export
Seamless Downloading
Data Control
Manage Microsoft 365

Get AdminDroid Office 365 Reporter Now!